
What Are Soap Nails, Exactly?
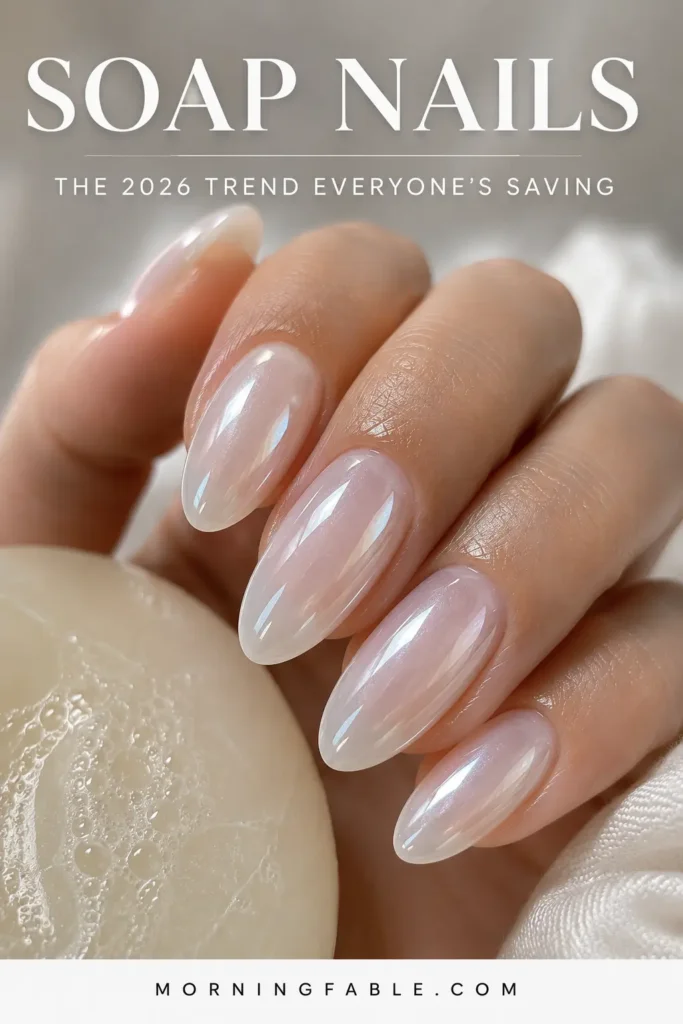
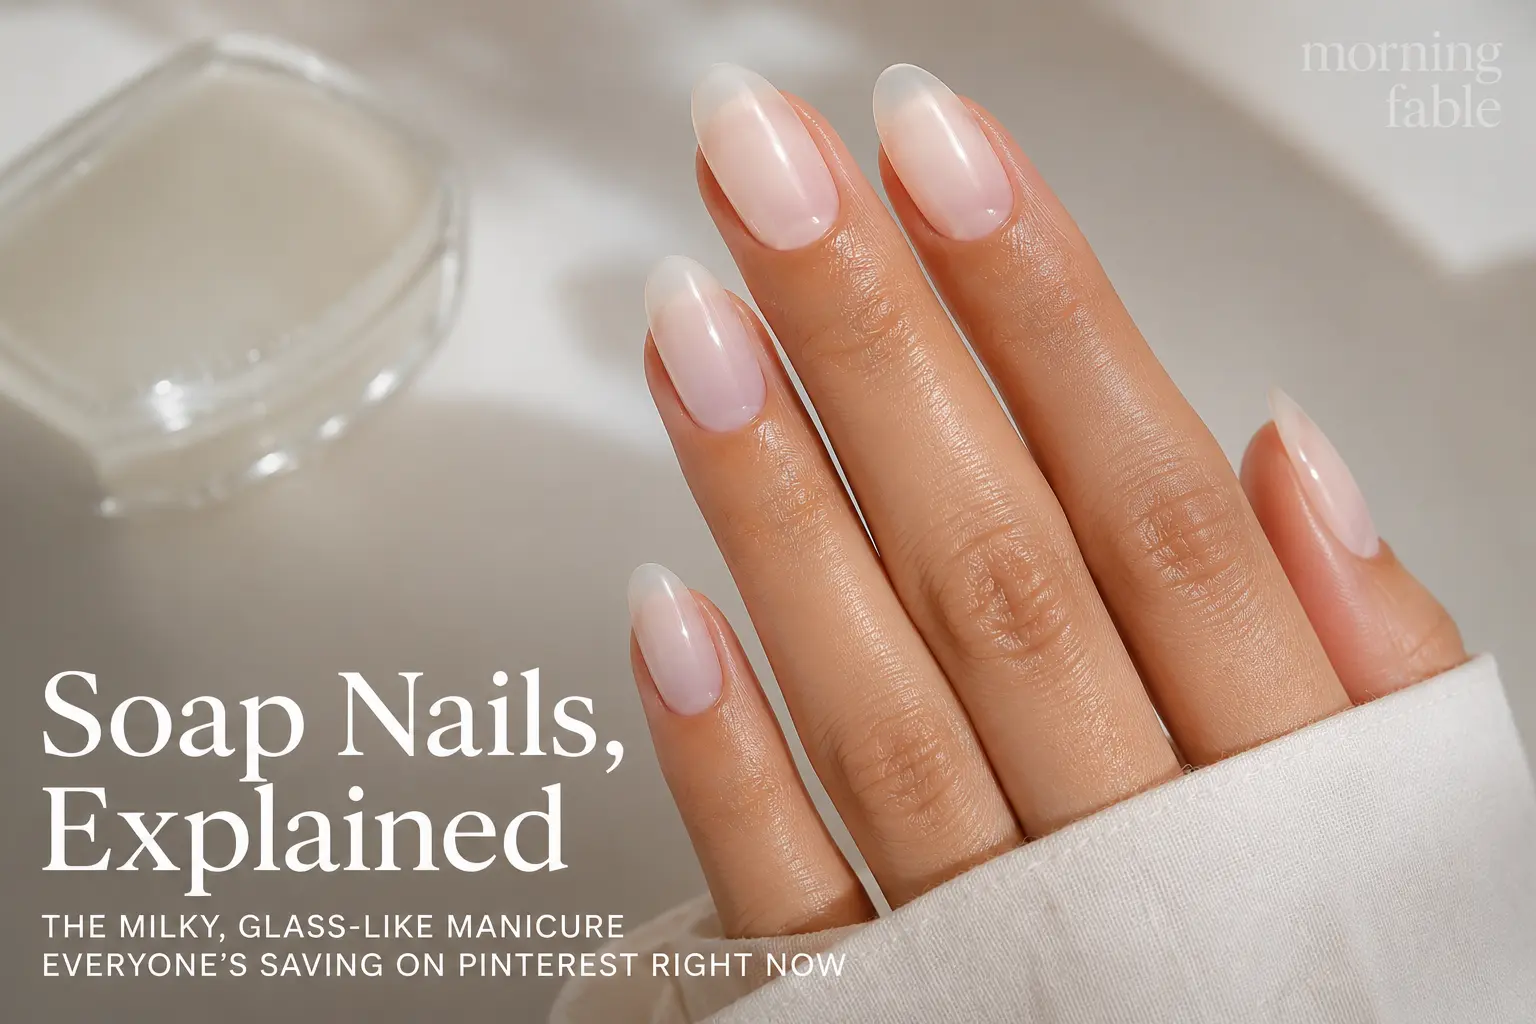
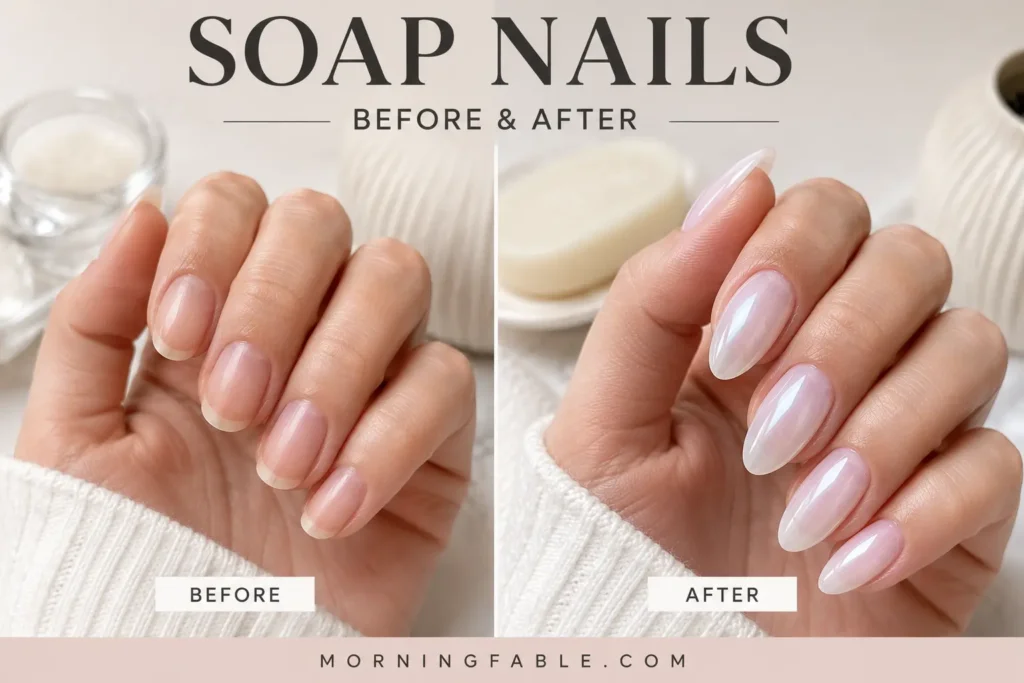
Soap nails get their name from their finish, not their color: a semi-sheer, milky-white base with a soft, almost foggy translucency, topped with a high-gloss coat that catches light the way wet soap does. It’s a close cousin of milky and “glazed donut” nails, but softer and less opaque — the goal isn’t a solid white tip, it’s a diffused, cloudy glow that changes slightly depending on the angle you look at it. If you’ve liked the clean, bright look of our elegant white nail ideas, soap nails are the softer, more diffused next step in that same family.
Where this trend earns its staying power is in how adaptable it is. It works on short or long nails, almond or square shapes, and pairs with nearly any outfit — which is part of why it’s shown up so consistently in 2026 forecasting alongside other clean, glossy, naturally-perfect manicure trends that are dominating both Pinterest boards and salon request lists this year.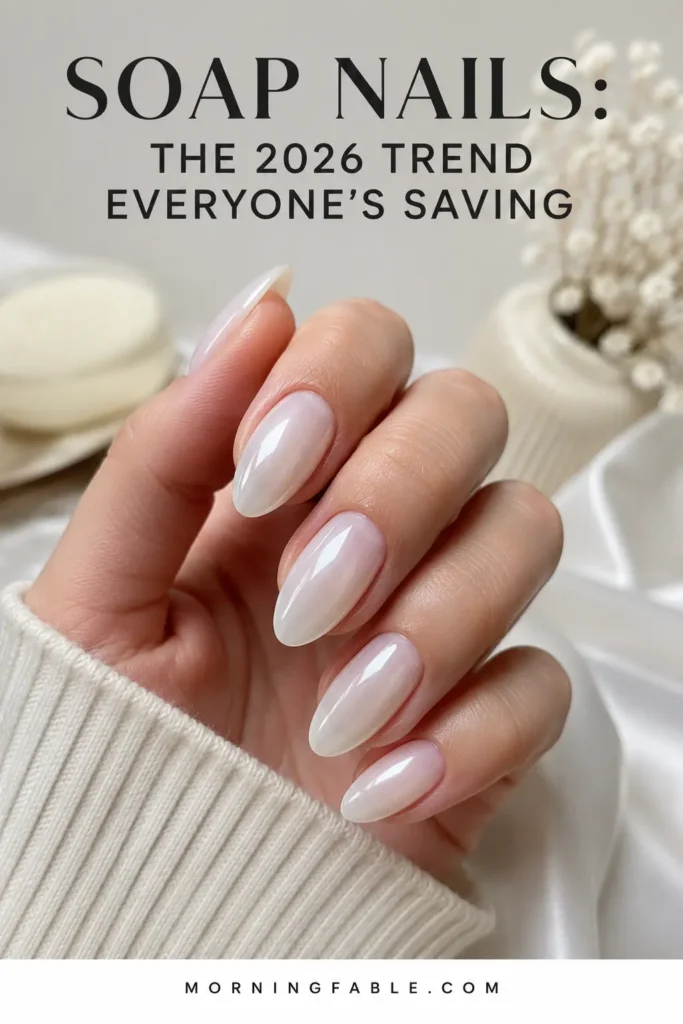
Why This Trend Is Built for Pinterest
A few things make soap nails unusually save-and-share-friendly, which is worth knowing whether you’re a DIYer building a mood board or a nail tech marketing your work: It photographs consistently. Unlike heavily textured 3D nail art, the soft diffusion of a soap manicure looks good in almost any lighting — natural window light, salon ring lights, phone flash. It’s a “how do I get this” trend, not just a “look at this” trend. Pinterest users don’t just want to see it, they want the steps, which is exactly the kind of content that earns saves and re-pins over a single view. It’s part of a bigger color-and-finish wave. Pinterest’s own 2026 trend forecasting flagged a shift toward more playful, saturated shades gaining search traction alongside the softer, quieter looks — meaning soap nails work well as a “palate cleanser” pin between bolder color trends, which is exactly the kind of contrast that performs well in Pinterest’s mixed-content feed.How to Get Soap Nails at Home: Step by Step
What you’ll need:
- A sheer milky-white gel or “milk bath” polish (not an opaque white)
- A pearl or shimmer-white gel for depth (optional but recommended)
- A high-shine, non-matte top coat
- A fine detail brush or dotting tool
- UV/LED lamp if using gel polish (the American Academy of Dermatology has helpful guidance on minimizing UV exposure during at-home gel manicures, worth a quick read if you do these often)
- 100/180 grit buffer block
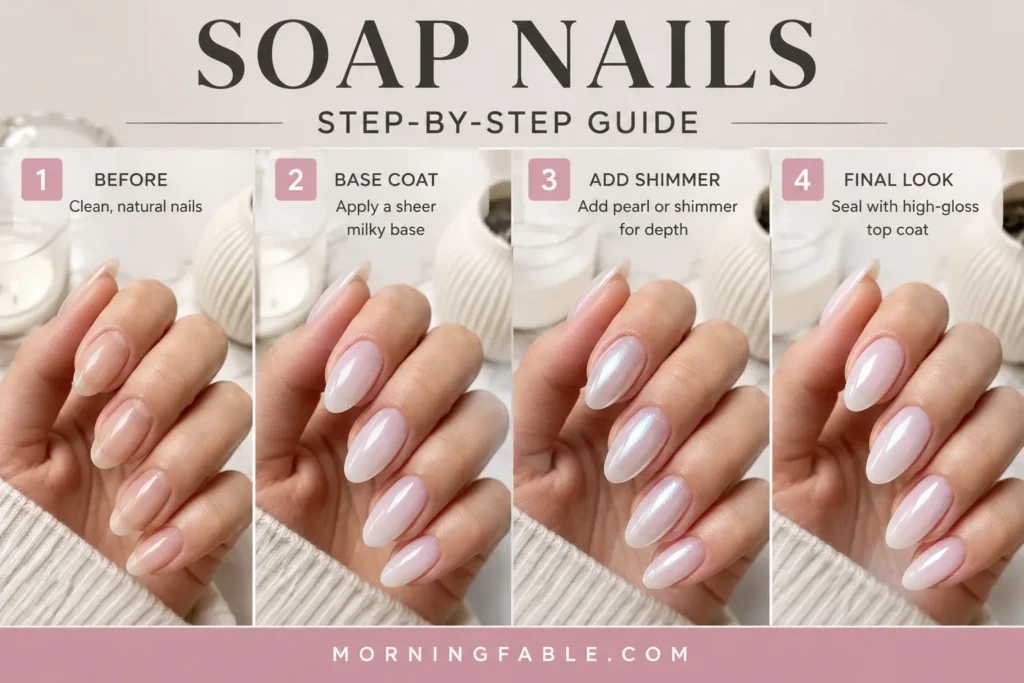
Step 1: Prep like it’s a gel manicure, because it is one. Push back cuticles, lightly buff the nail surface to remove shine (this helps the sheer layers grip evenly), and wipe with alcohol to remove oils. Uneven prep is the #1 reason soap nails come out patchy instead of smooth.
Step 2: Apply one thin coat of clear or barely-tinted base. Cure fully. This step matters more here than in a standard manicure — soap nails rely on thin, even layers to get that “light passing through soap” translucency, so a thick base coat will flatten the effect before you even start.
Step 3: Layer the sheer milky white — thin coats only. Apply one very thin coat, cure, then assess. Most soap looks need 2–3 thin layers rather than one thick one. Building it up in thin layers is what creates the soft gradient/fog look instead of a flat, opaque white.
Step 4: Add dimension with a pearl or shimmer accent. Using your detail brush, sweep a small amount of pearl or icy-shimmer gel through the center of the nail or along one edge. This is what gives soap nails their subtle “light catching soap film” quality instead of looking like a plain milky manicure.
Step 5: Seal with a high-gloss top coat. This is non-negotiable — a matte top coat will kill the entire effect. Cure fully, then wipe away any tacky residue.
Step 6: Cuticle oil, always. Because the whole look depends on light and shine, dry cuticles or ridges will show more than usual. Finish with cuticle oil for the final glassy effect.
Common Mistakes (and How to Fix Them)
- Nails look chalky instead of glassy → Your white layers are too thick. Remove and rebuild with thinner coats.
- The effect looks flat/one-dimensional → You skipped the pearl/shimmer layer, or applied it too evenly instead of asymmetrically.
- Polish looks streaky → Sheer gel polishes are notoriously streak-prone; always cure between thin coats rather than trying to fix streaks in one thick layer.
- It’s chipping fast → Check your top coat cure time — sheer/milky gels often need a few extra seconds under the lamp compared to standard color gels.
How Long Does a Soap Manicure Last?
With gel polish and proper curing, expect 2–3 weeks before you’ll want a fill, similar to any gel manicure. Because the design relies on thin, sheer layers rather than an opaque base, some people find very fine tip wear more visible sooner than with a solid color — keeping a bottle of matching top coat on hand for a quick weekly refresh helps extend it.
Variations to Try
- Soap French: the same sheer milky base with a barely-there, almost invisible white tip line — a softer take on the look in our French tip nail designs post
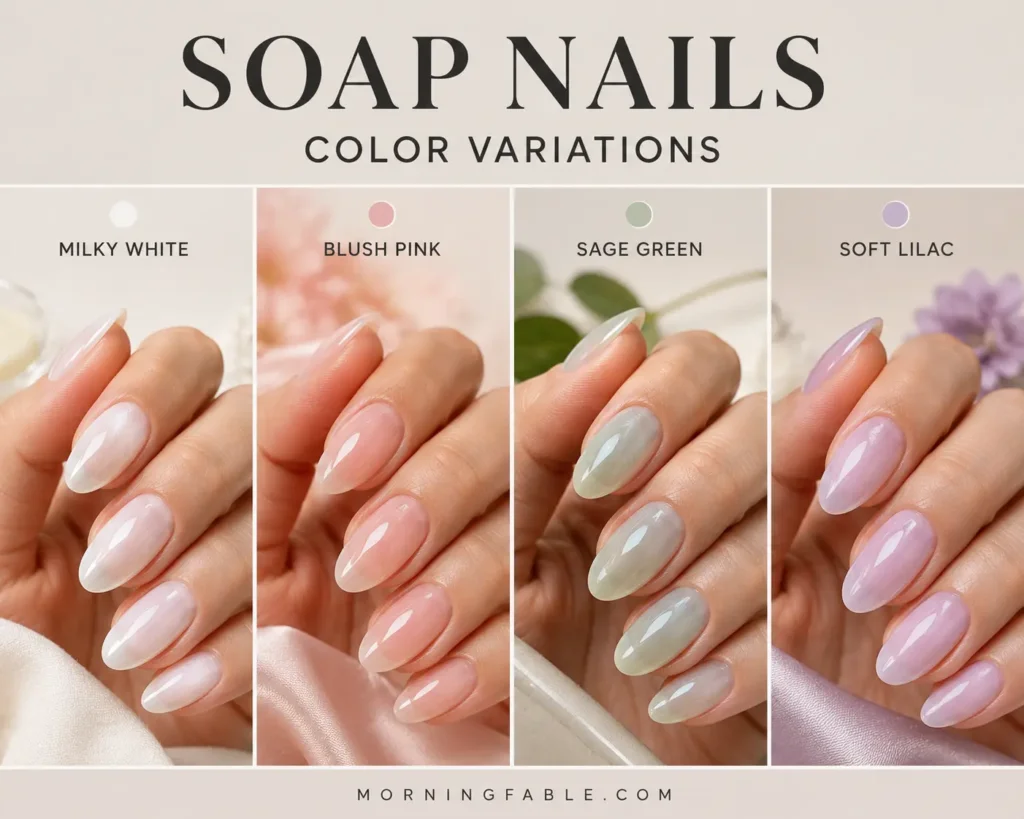
- Colored soap nails: swap the milky white for a sheer blush, lilac, or sage base for the same glassy effect with a hint of color
- Soap + chrome: a light dusting of chrome powder over the top coat for extra shine, riding the same all-year shimmer and chrome wave that’s dominating 2026 nail trends more broadly — similar to the shine we love in our cat eye summer nails tutorial
Want more tested, step-by-step nail tutorials like this one — not just galleries of pretty pictures, but the actual technique behind them? That’s exactly what we do over at Morning Fable. Come find your next manicure inspiration (and the real how-to behind it) at morningfable.com.