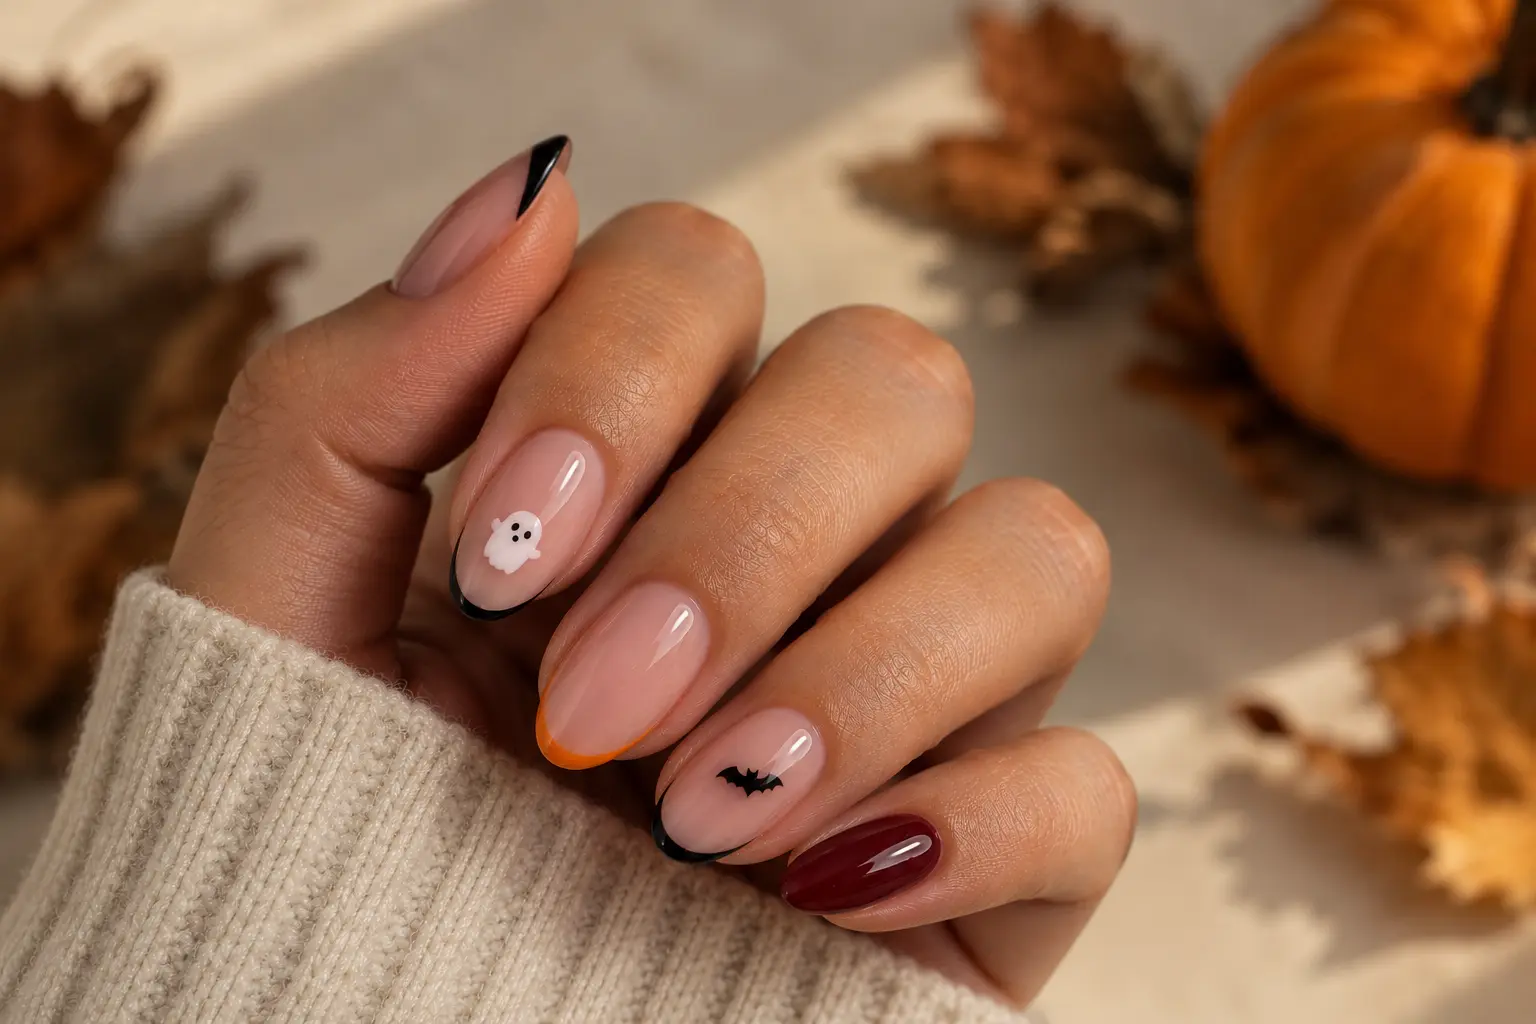

Easy Halloween nails for beginners, featuring simple, cute, and spooky designs from tiny ghosts to black French tips.
Easy Halloween nails do not have to mean complicated spiderwebs, hand-painted portraits, or a salon appointment that takes half the day. Some of the cutest Halloween manicures are also the easiest: a black French tip, a tiny white ghost, a few orange dots, or one spooky accent nail can make a simple manicure feel perfectly seasonal.
The ideas below are beginner-friendly and flexible enough to work on short nails, long nails, almond shapes, squares, and everything in between. If you want more dramatic inspiration, browse MorningFable’s full Halloween nail ideas guide. Most of these looks can be recreated with regular polish and a few basic tools.
Easy Halloween Nails: 25 Simple Ideas
1. Tiny Ghost Accent Nails
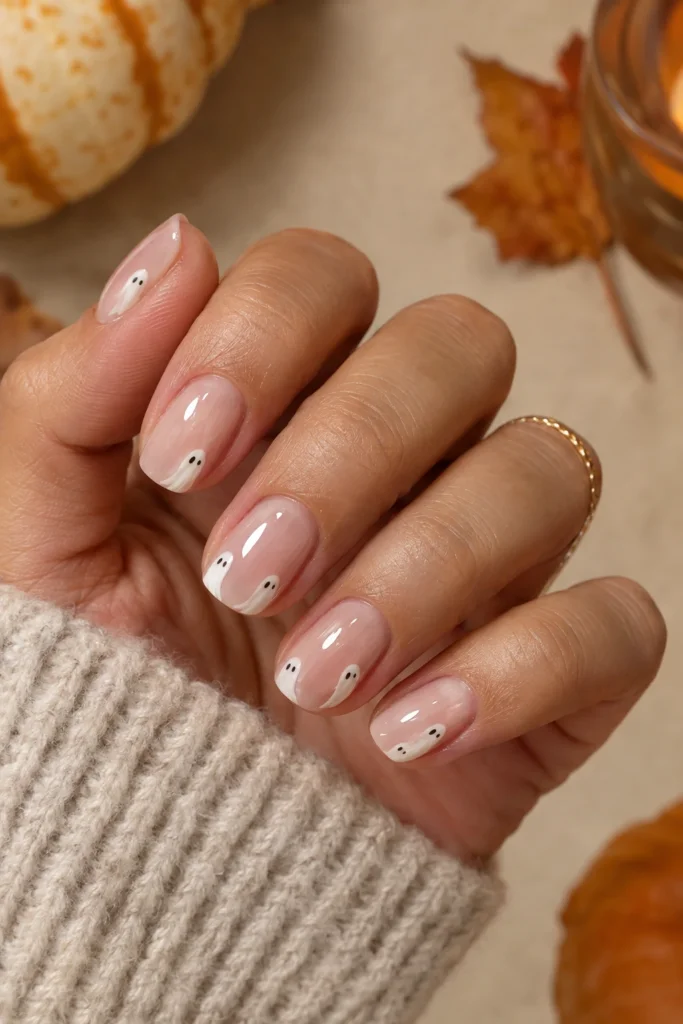
Start with a sheer nude or pale pink base, then add one or two tiny white ghosts on accent nails. You do not need perfect shapes — slightly uneven ghosts actually look cuter. Add two small black dots for eyes and finish with a glossy top coat.
Easy tip: Use the rounded end of a bobby pin for the eyes if you do not own a dotting tool.
Best for: Short natural, squoval, or oval nails
Ask for at the salon: Sheer nude or pale pink base, one or two tiny white ghost accents, tiny black dot eyes, and a glossy top coat.
2. Black French Tips
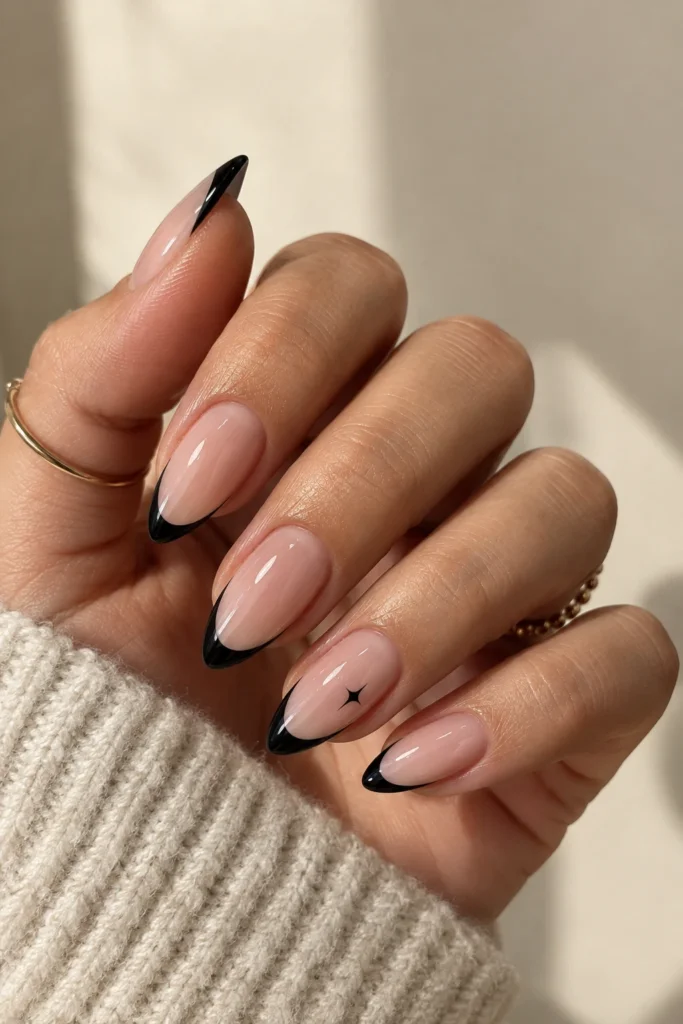
Swap classic white French tips for black and you instantly have a Halloween-ready manicure. Keep the base natural for a clean, understated look, or add one tiny star, moon, or ghost.
Why it works: It feels festive without looking costume-like, so you can wear it long after Halloween night.
Best for: Short square, squoval, or almond nails
Ask for at the salon: Sheer nude base with crisp thin black French tips and an optional tiny black star on one accent nail.
3. Orange and Black Dots
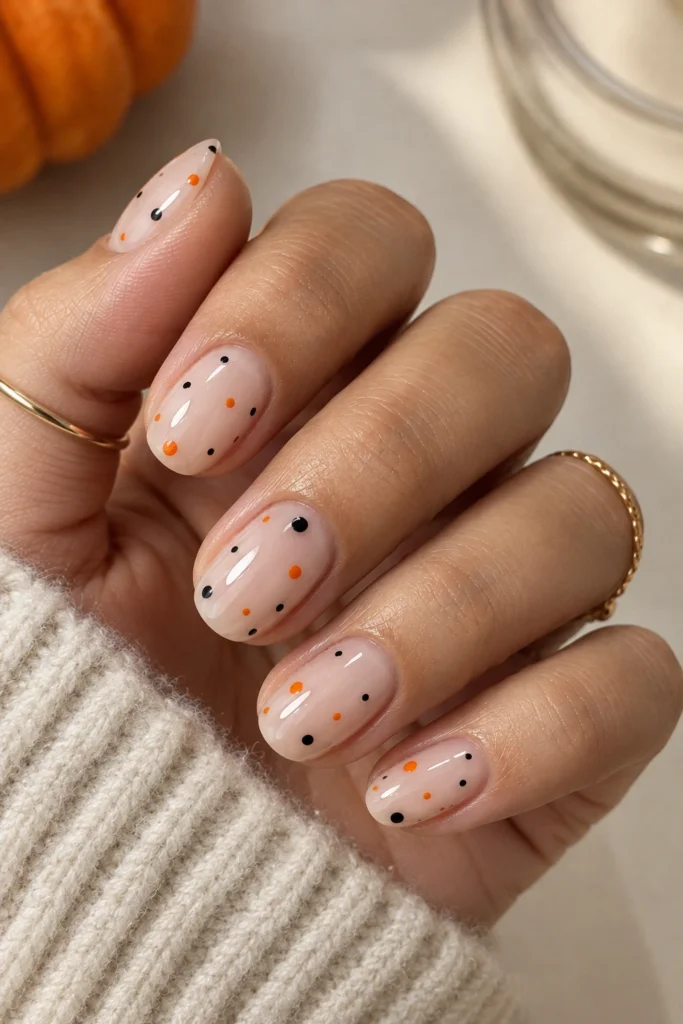
A dotted manicure is one of the easiest nail-art looks to recreate. Paint your nails a milky nude, then scatter orange and black dots across each nail. Mix large and small dots so the design feels intentional rather than perfectly uniform.
Easy tip: A toothpick works well for tiny dots, while the end of a makeup brush can create larger ones.
Best for: Beginners and short nails
Ask for at the salon: Milky nude base with scattered orange and black dots in mixed sizes.
4. Minimal Spiderweb Nail
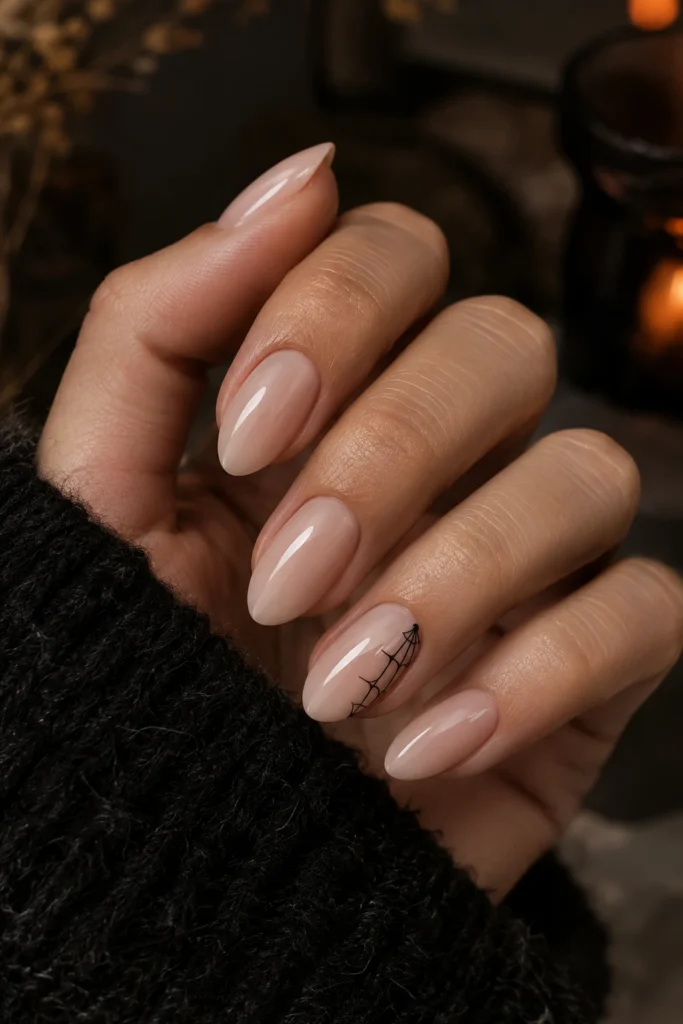
Keep most nails solid black or nude and add a simple spiderweb to just one accent nail. Draw three or four thin lines from one corner, then connect them with small curved strokes. The less perfect it is, the more hand-drawn and charming it looks.
Best for: One-accent-nail manicures
Ask for at the salon: Nude or black base with one fine-line black spiderweb accent.
5. Cute Pumpkin Nails
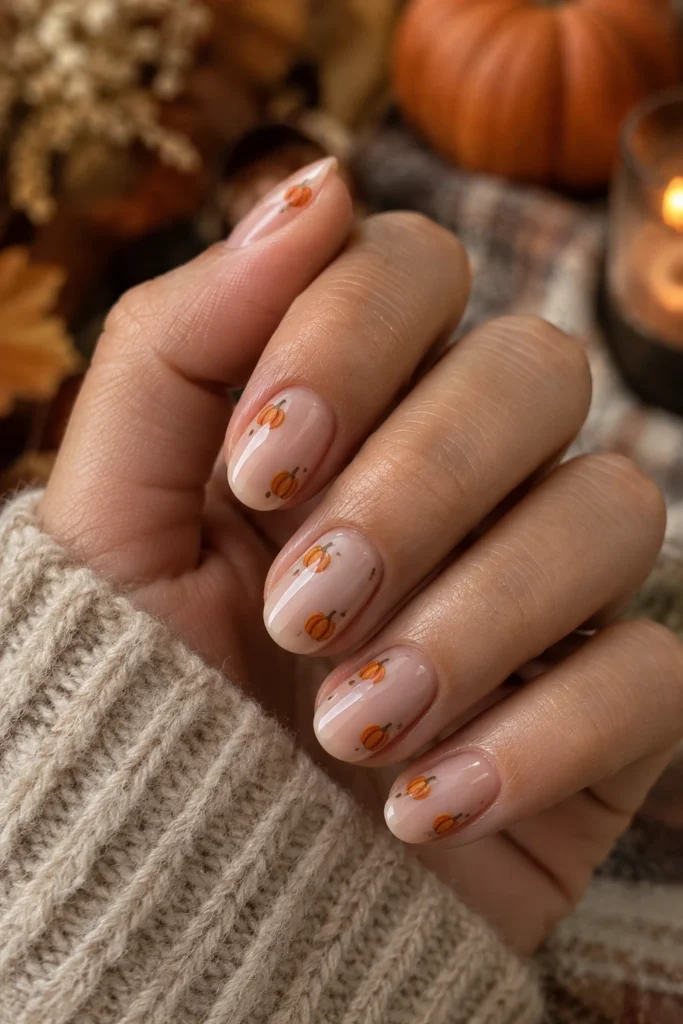
Paint a few tiny orange half-circles or pumpkins over a nude base. Add a short green or brown stem, and you are done. You can keep the pumpkins plain or add simple jack-o’-lantern faces to one or two of them.
Easy tip: Make the pumpkins small. Tiny shapes are more forgiving than trying to paint a large, perfectly symmetrical pumpkin.
Best for: Cute Halloween looks and short nails
Ask for at the salon: Nude base with tiny muted-orange pumpkins and short brown or green stems.
6. Blood Drip French Tips
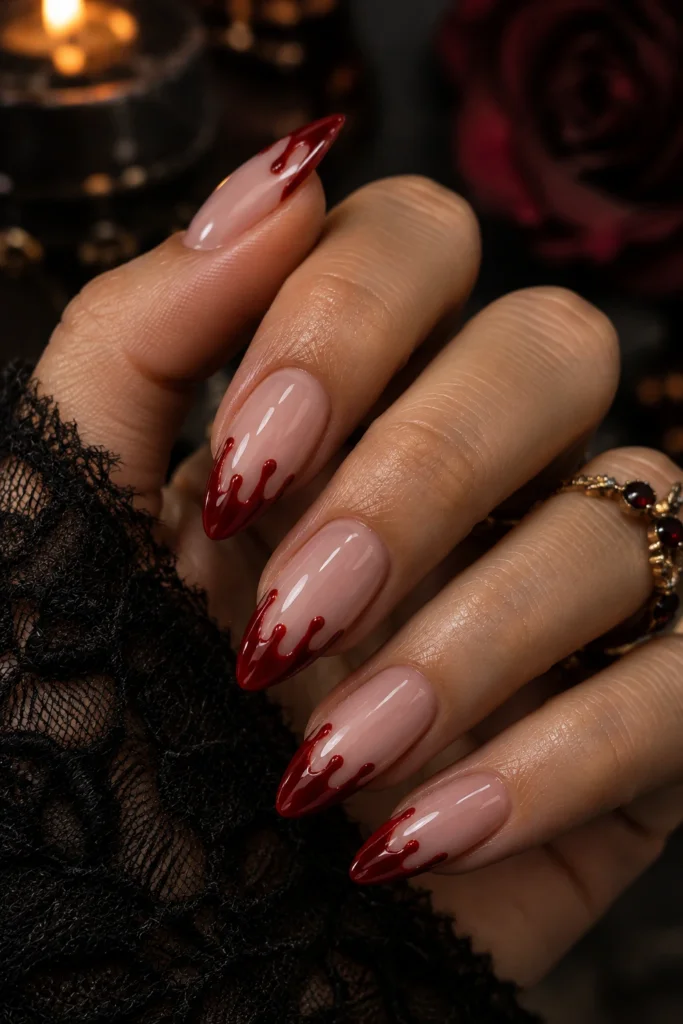
For a slightly creepy look, paint red polish along the tips and pull a few rounded drips downward. A dotting tool makes the rounded ends easy to create. Pair the red with a sheer pink base so the design stays clean and wearable.
Style note: Deep cherry red makes the look feel more chic, while bright red makes it more playful and graphic.
Best for: Party nails and vampire-inspired looks
Ask for at the salon: Sheer pink base with deep cherry-red drip tips and a glossy finish.
7. Black Nails With One Ghost
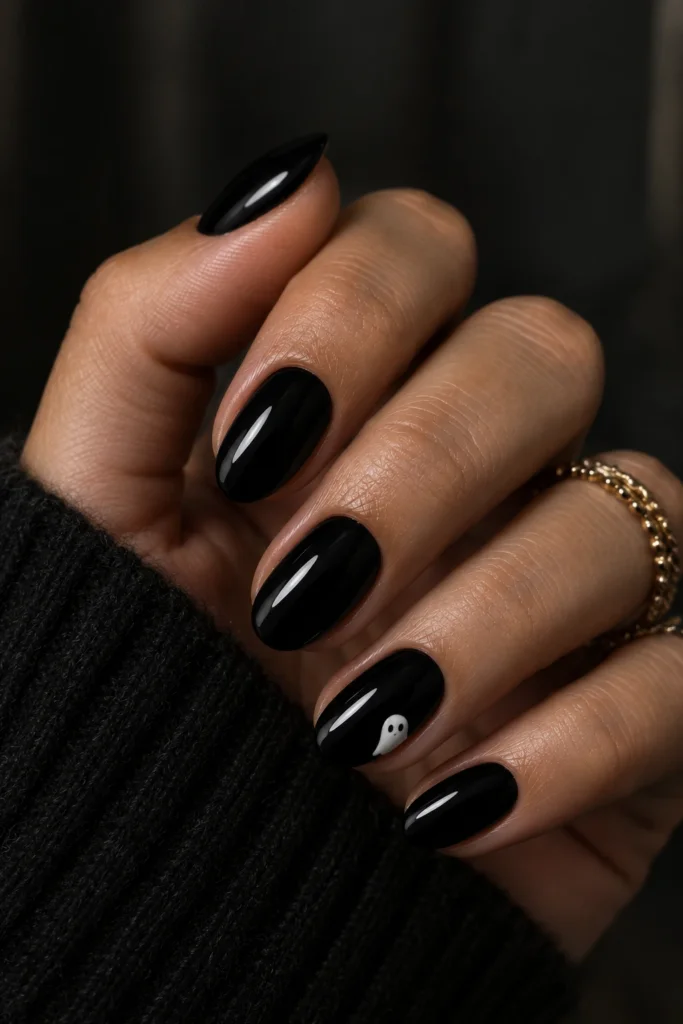
If you prefer dark nails, paint every nail glossy black and add a single white ghost to one accent nail. This is one of the fastest Halloween manicures because almost the entire set is just a solid color.
Easy tip: Use a white nail-art pen if painting the ghost with a brush feels intimidating.
Best for: Fast DIY manicures
Ask for at the salon: Glossy opaque black manicure with one small white ghost accent.
8. Halloween Skittle Nails
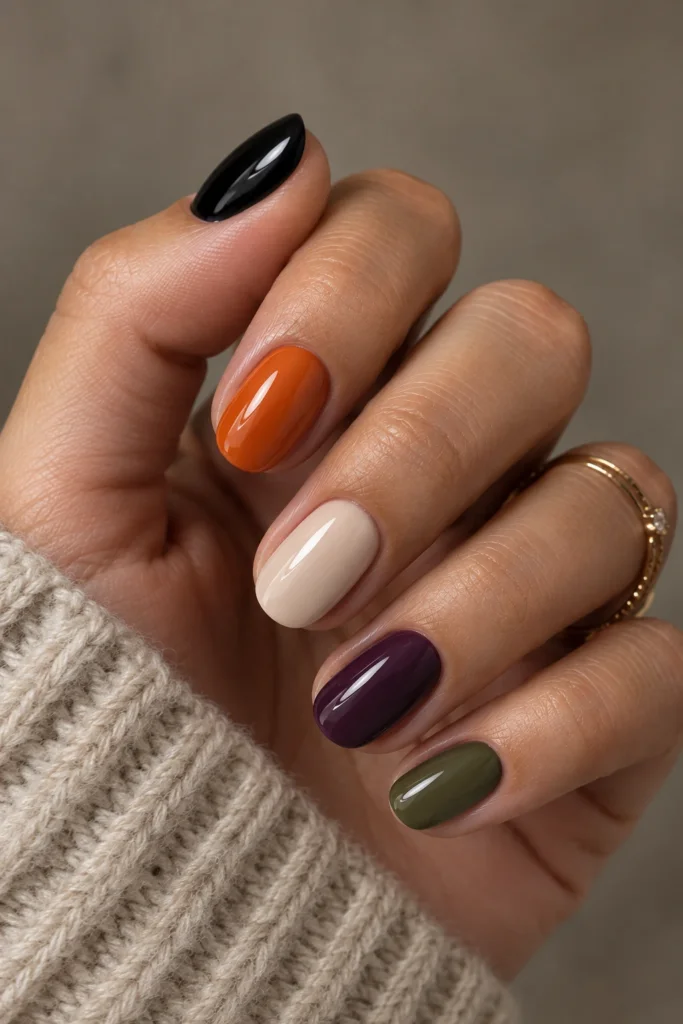
Choose a small Halloween color palette — black, orange, cream, deep purple, and olive green — and paint each nail a different shade. No nail art is required, but the color combination still looks intentional and seasonal.
Best for: Absolute beginners
Ask for at the salon: Five coordinated solid shades: black, pumpkin orange, cream, deep purple, and olive green.
9. Simple Bat Silhouettes
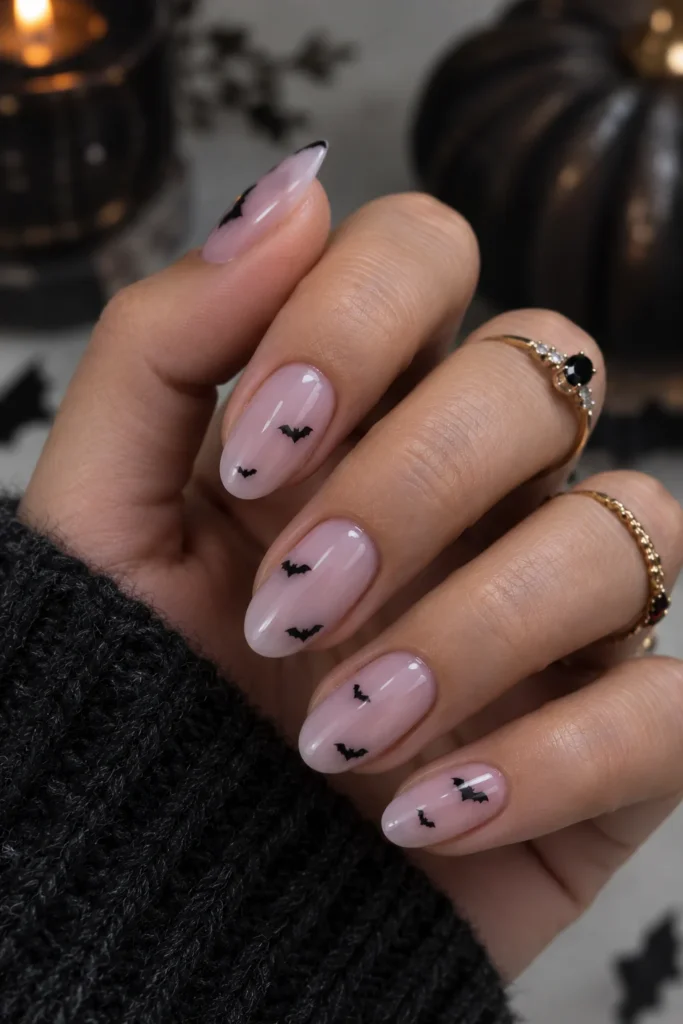
Paint tiny black bat shapes over a nude, gray, or pale lavender base. You only need a small center body and two angled wings. Keep the bats scattered and small so you do not have to make every one identical.
Easy tip: If freehand bats feel difficult, use tiny nail stickers over a polished base and seal them with top coat.
Best for: Simple spooky nail art
Ask for at the salon: Pale lavender or nude base with tiny scattered black bat silhouettes.
10. Candy Corn Tips
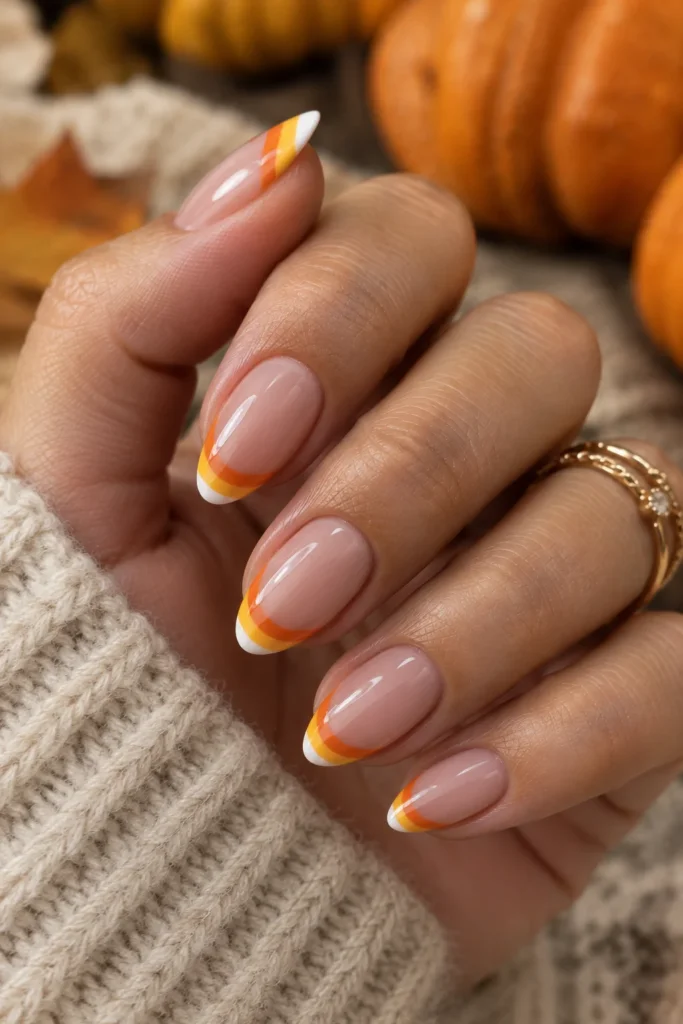
Turn your French tips into mini candy corn stripes using white, orange, and yellow. You can do the full three-color pattern on every tip or use it on just two accent nails and keep the rest orange.
Best for: Cute, colorful Halloween manicures
Ask for at the salon: Sheer nude base with white, orange, and yellow candy-corn French tips.
11. Matte Black Nails
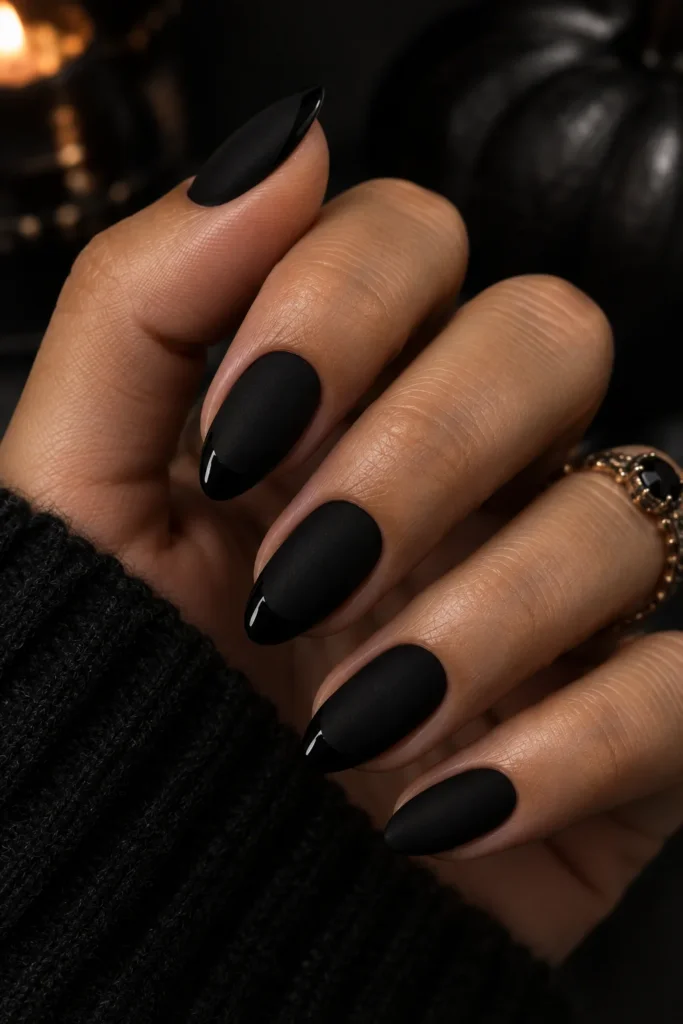
Sometimes the easiest manicure is also the boldest. Paint your nails black and add a matte top coat. The velvety finish gives a basic black manicure an instant Halloween mood without any nail art at all.
Optional upgrade: Add one glossy black French tip over the matte base for subtle contrast.
Best for: Minimalists and office-friendly Halloween nails
Ask for at the salon: Solid black manicure with a velvety matte top coat and optional glossy-black tips.
12. Eyeball Accent Nails
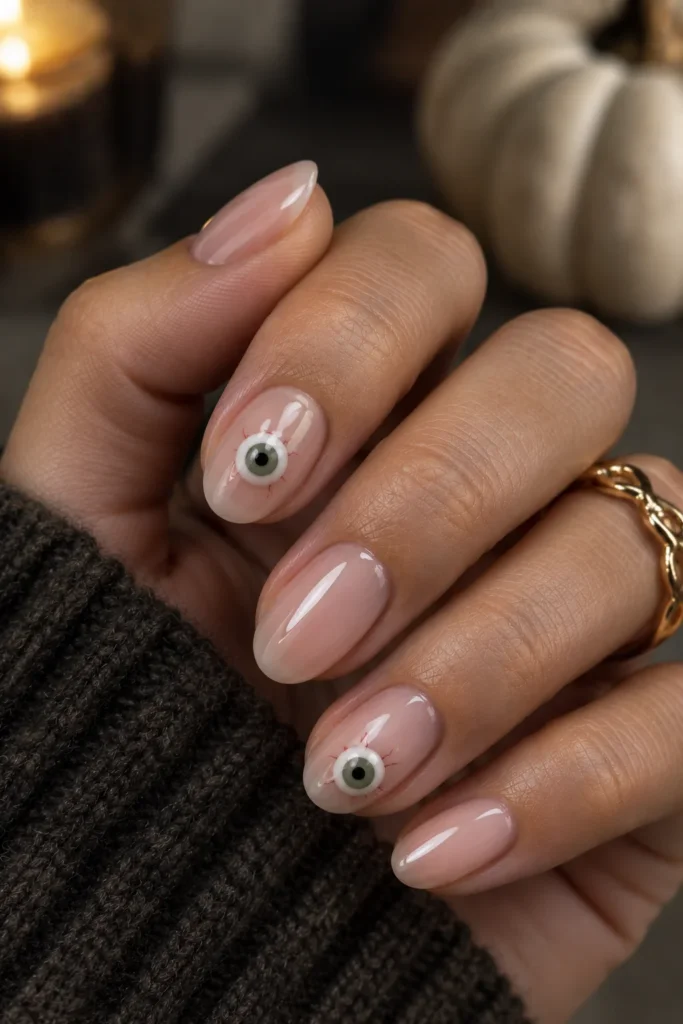
Start with a pale base and add a small white circle, a colored dot, and a tiny black center to create an eyeball. One or two eyeballs are enough to make the manicure feel fun and spooky.
Easy tip: Build the eye from the largest dot to the smallest and let each layer dry before adding the next.
Best for: Playful beginner nail art
Ask for at the salon: Pale base with one or two simple eyeball accents made from layered white, colored, and black dots.
13. Black and White Mix-and-Match Nails
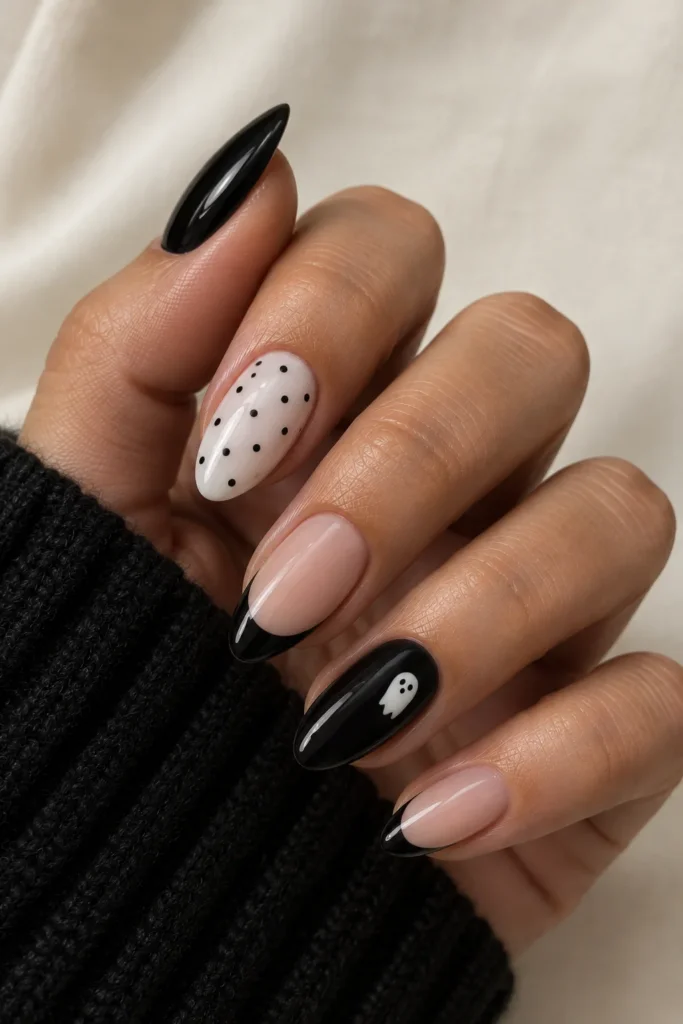
Alternate simple black and white designs: one solid black nail, one white nail with dots, one black French tip, and one tiny ghost. Because every nail is different, you do not have to recreate the same design perfectly ten times.
Why it works: Mix-and-match sets are forgiving and look intentionally creative.
Best for: Mix-and-match sets
Ask for at the salon: Alternating black, white, black French tip, dots, and tiny ghost designs.
14. Orange French Tips
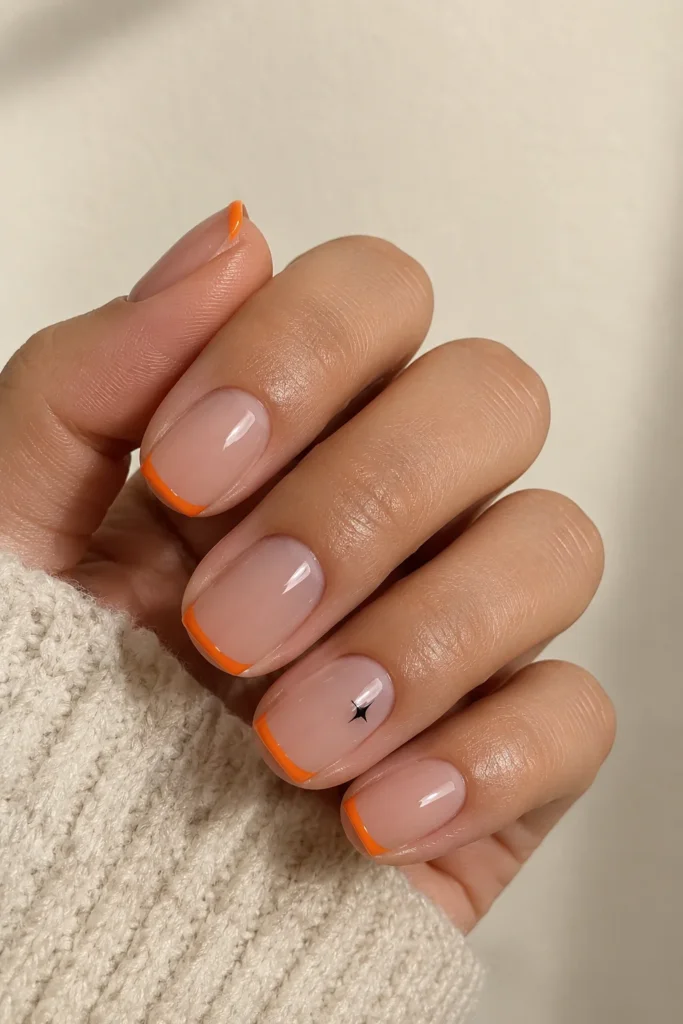
For the easiest possible Halloween French manicure, use pumpkin orange on the tips and keep the base sheer. Add a tiny black dot or star to one nail if you want a little extra detail.
Best for: Short nails and subtle seasonal manicures
Ask for at the salon: Sheer nude base with thin pumpkin-orange French tips and one tiny black star.
15. Little Black Hearts
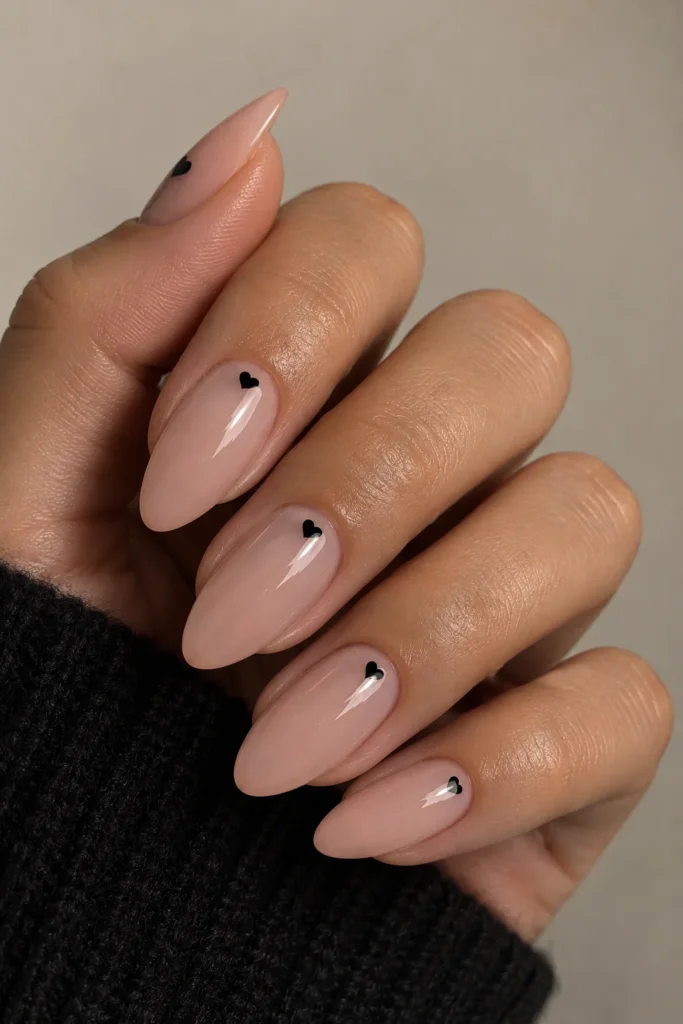
Black hearts over a sheer nude base feel slightly gothic without being over the top. Paint one small heart near the cuticle or tip of each nail, or mix them with tiny black dots and stars.
Easy tip: Make a heart with two dots placed side by side, then pull both dots down into a point.
Best for: Gothic-but-cute minimal nails
Ask for at the salon: Sheer nude base with tiny black hearts placed near the cuticle or tip.
16. Glow-in-the-Dark Accent Nail
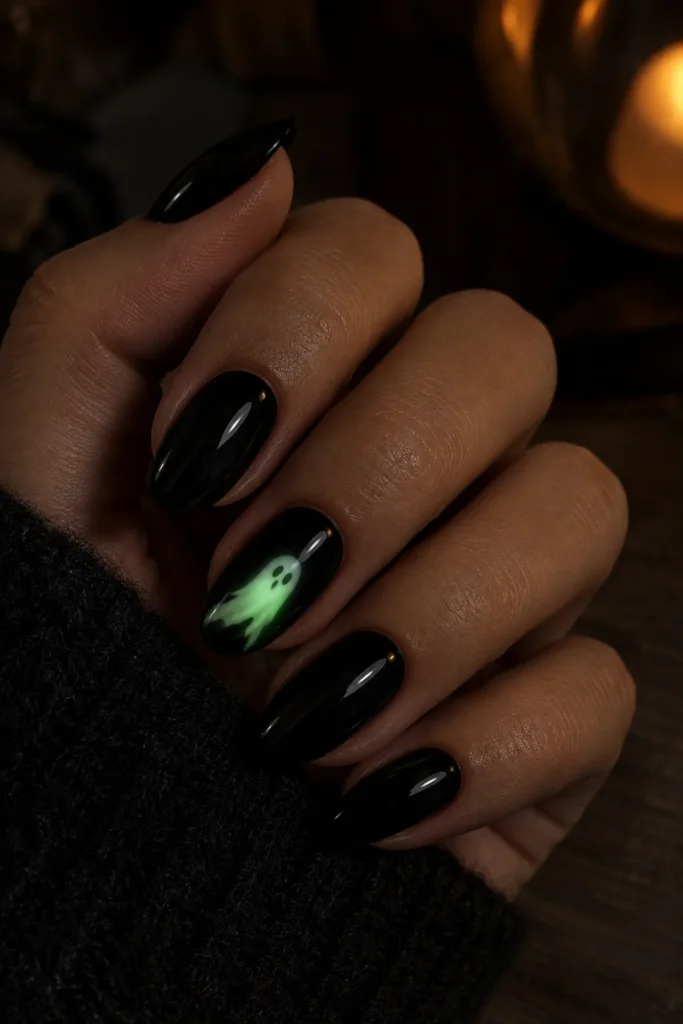
Use a glow-in-the-dark polish on one or two nails and keep the rest black, orange, or nude. It is an easy way to make a simple manicure feel more Halloween-specific, especially for parties or trick-or-treating.
Style idea: Layer the glow polish beneath a tiny ghost for a fun nighttime effect.
Best for: Halloween parties and night events
Ask for at the salon: Black or nude manicure with one glow-in-the-dark accent nail or glowing ghost.
17. Mismatched Ghost Faces
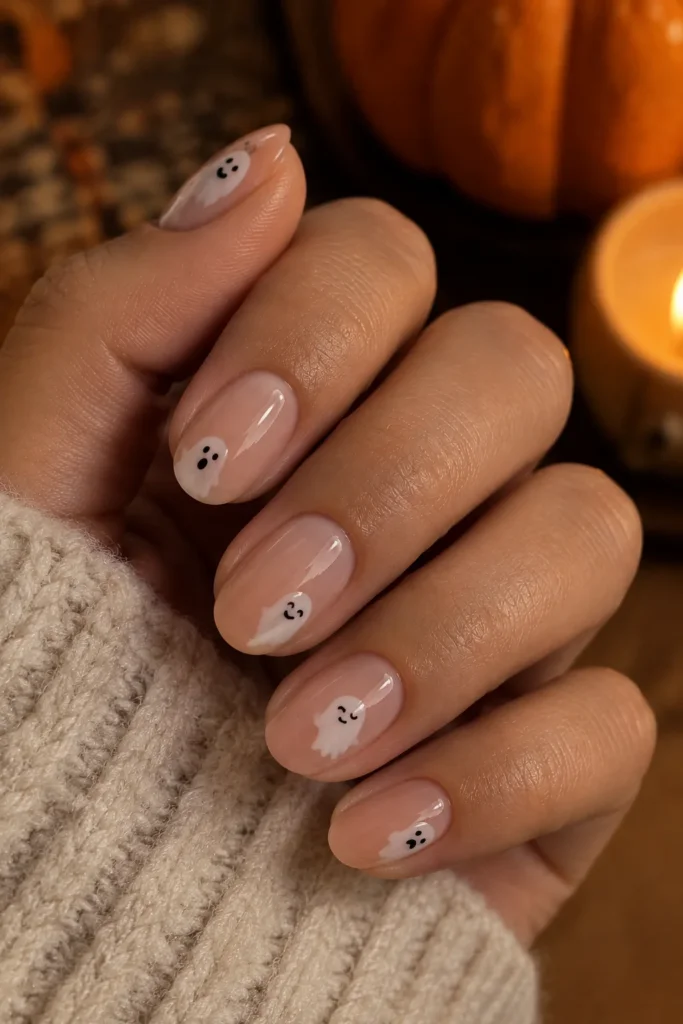
Paint small white blobs on a nude base, then give each one a different face — surprised, sleepy, happy, or scared. Because the faces are intentionally mismatched, there is no pressure to make them identical.
Best for: Cute, playful DIY sets
Ask for at the salon: Sheer nude base with small white ghosts, each with a different simple face.
18. Simple Moon and Star Nails
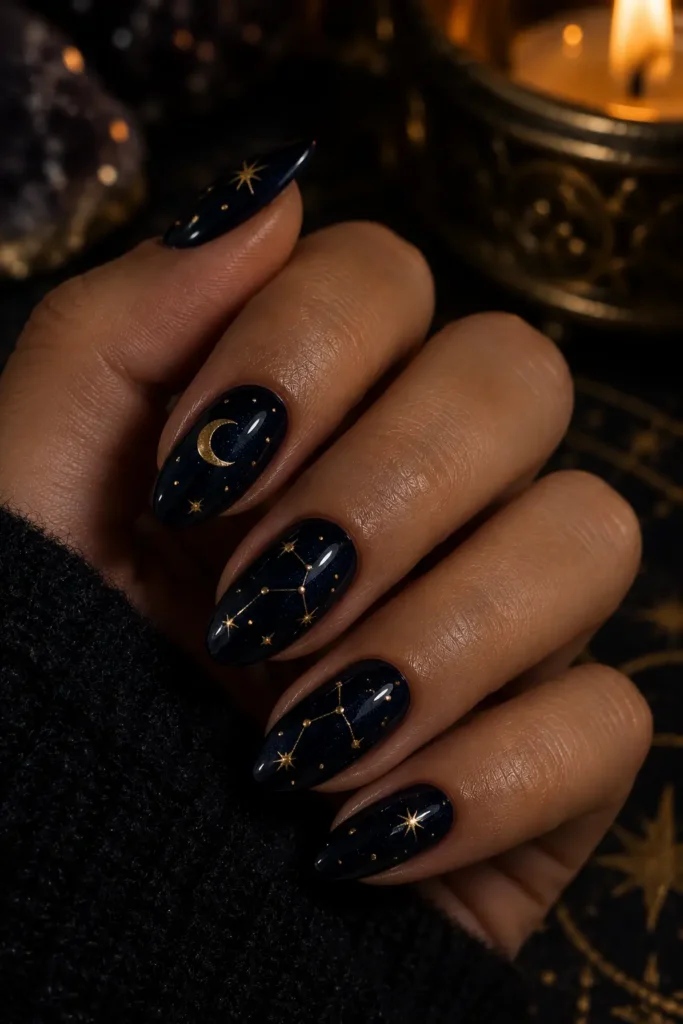
A black or deep navy base with tiny gold, silver, or white moons and stars creates a moody October manicure that still feels elegant. Keep the celestial details very small and leave plenty of negative space.
Easy tip: A few dots around the stars make the design look fuller without requiring extra drawing skill.
Best for: Witchy and elegant Halloween nails
Ask for at the salon: Black or deep navy base with tiny white, silver, or gold moons, stars, and dots.
19. Pumpkin Orange Chrome
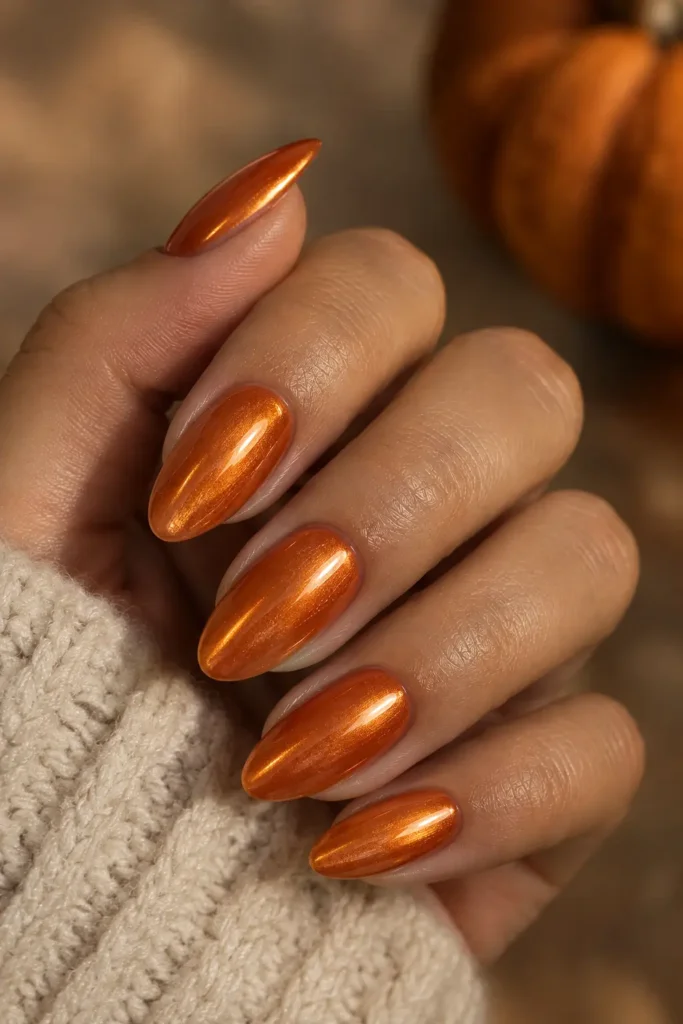
If you like trendy nails but do not want detailed art, choose a rich orange base and add a chrome or glazed finish. The color gives the Halloween effect while the reflective top layer makes it feel current.
Best for: Trend-led seasonal nails without character art
Ask for at the salon: Rich pumpkin-orange base with a restrained pearly chrome glaze.
20. Black Swirls on Nude Nails
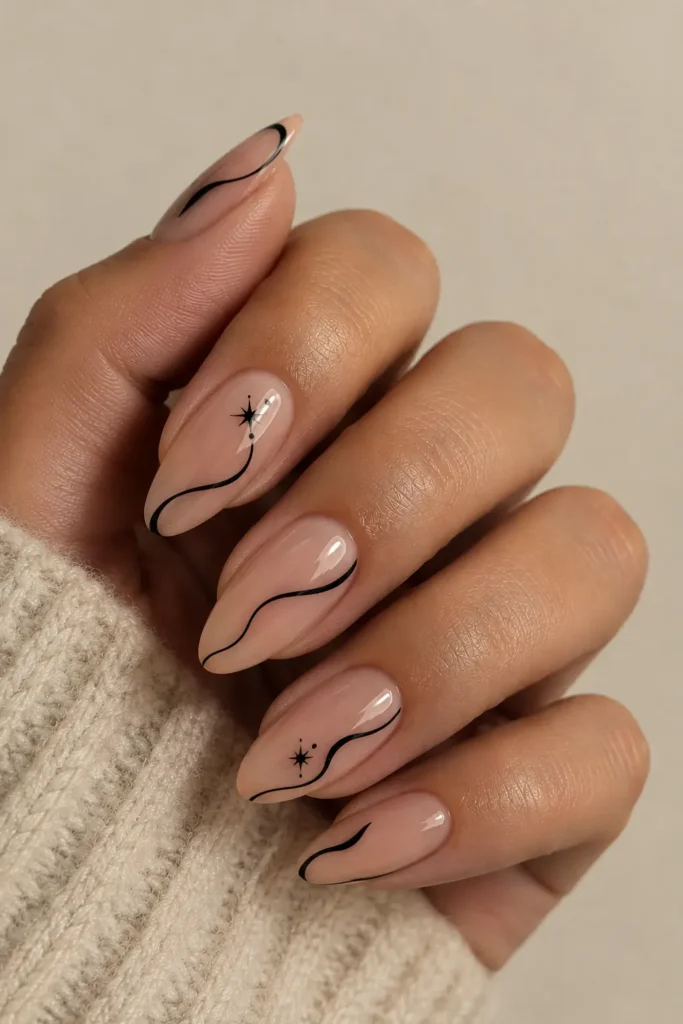
Thin black swirls over a sheer nude base look graphic, slightly spooky, and much easier than detailed illustrations. Make every swirl different so you do not have to worry about symmetry.
Easy tip: Use a very thin liner brush and remove excess polish before drawing the lines.
Best for: Modern abstract Halloween nails
Ask for at the salon: Sheer nude base with thin freeform black swirls.
21. Frankenstein Color-Block Nails
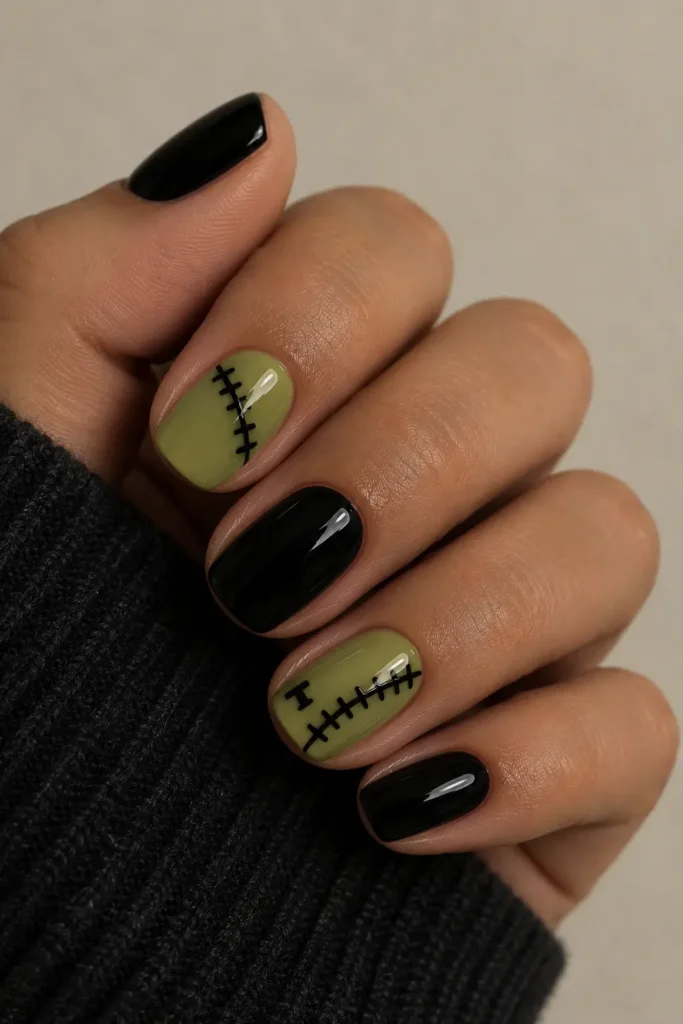
Use lime or muted green polish on one or two nails, then add a few simple black stitch marks. Pair them with solid black nails for a Frankenstein-inspired manicure that requires almost no drawing.
Optional detail: Add two tiny black dots as bolts near the side of an accent nail.
Best for: Playful Frankenstein-inspired nails
Ask for at the salon: Muted lime-green accent nails with simple black stitch marks, paired with solid black nails.
22. Mini Skeleton Smile
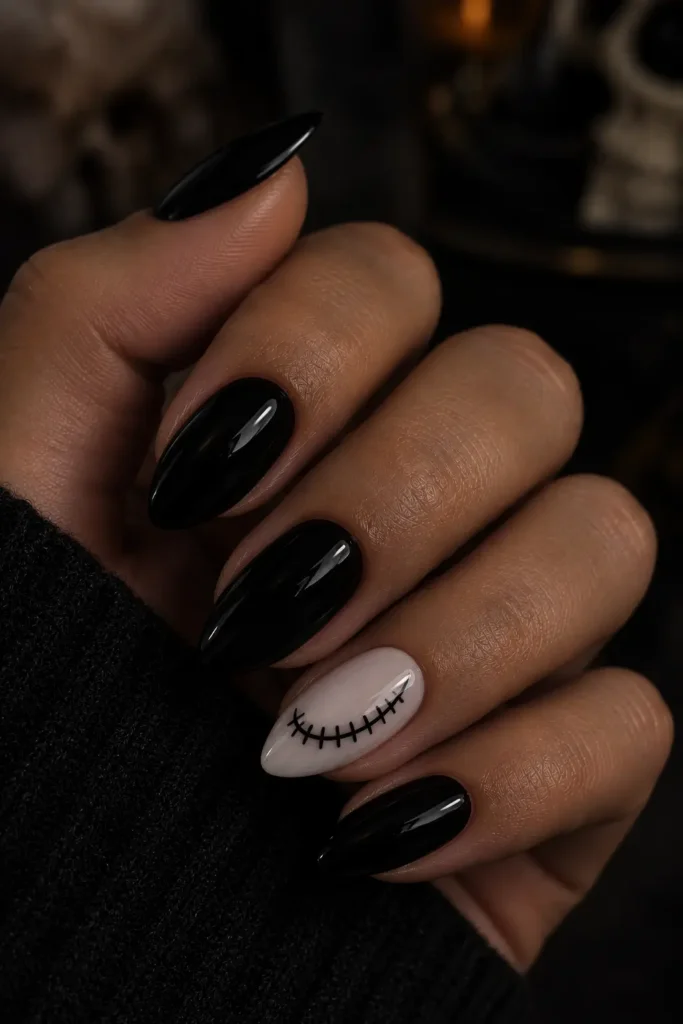
Paint one accent nail white and add a simple black curved smile with several tiny vertical lines. It gives a skeleton or stitched-mouth effect without having to draw an entire skull.
Best for: Edgy accent-nail designs
Ask for at the salon: One white accent nail with a curved black skeleton smile and tiny vertical stitch lines.
23. Purple Halloween Nails
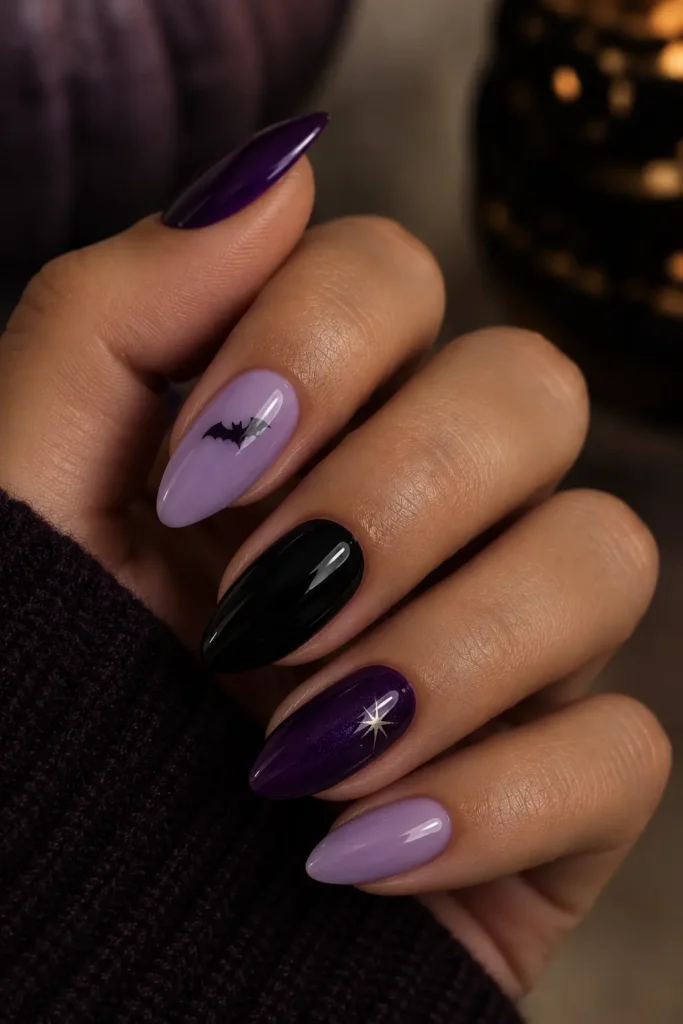
Use deep purple, lilac, and black across different nails for a softer alternative to orange. Add one tiny star, bat, or spiderweb if you want, or leave the manicure as a simple color mix.
Why it works: Purple still reads as Halloween, but it feels a little less predictable.
Best for: Purple lovers and softer spooky looks
Ask for at the salon: Mix of deep purple, lilac, and black with one tiny star, bat, or web accent.
24. Black Micro French With Dots
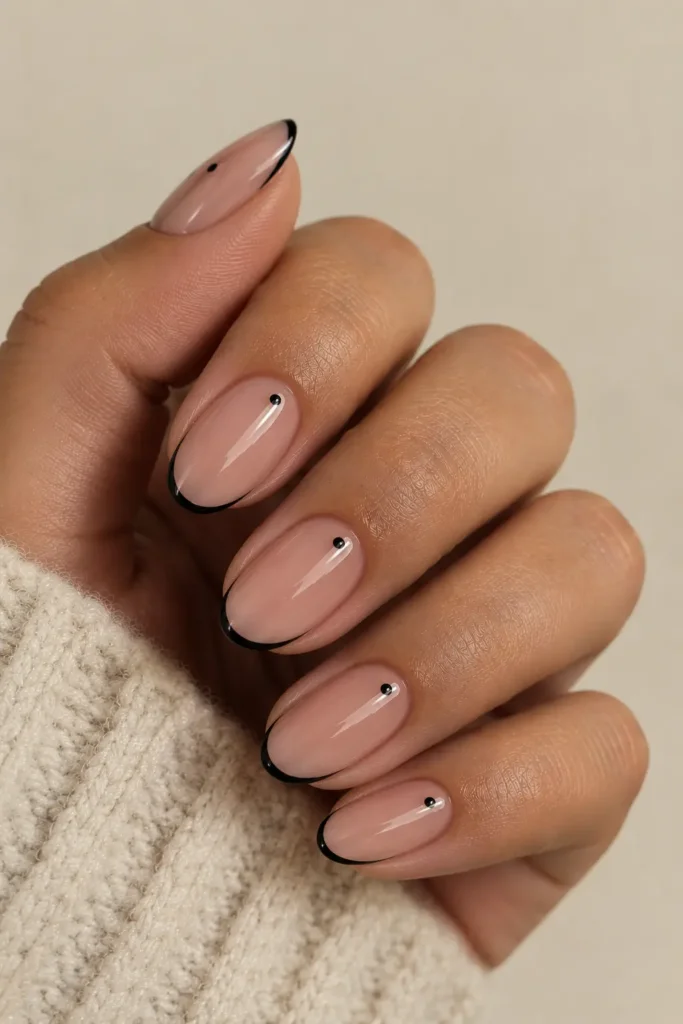
Paint a very thin black French tip, then add one tiny black dot near the cuticle. The result is minimal, modern, and subtle enough for everyday wear while still fitting an October mood.
Easy tip: Short nails look especially good with a micro French because the thin line keeps the nail visually longer.
Best for: Short nails and ultra-minimal manicures
Ask for at the salon: Sheer nude base with black micro-French tips and one tiny dot near each cuticle.
25. Simple Halloween Sticker Nails
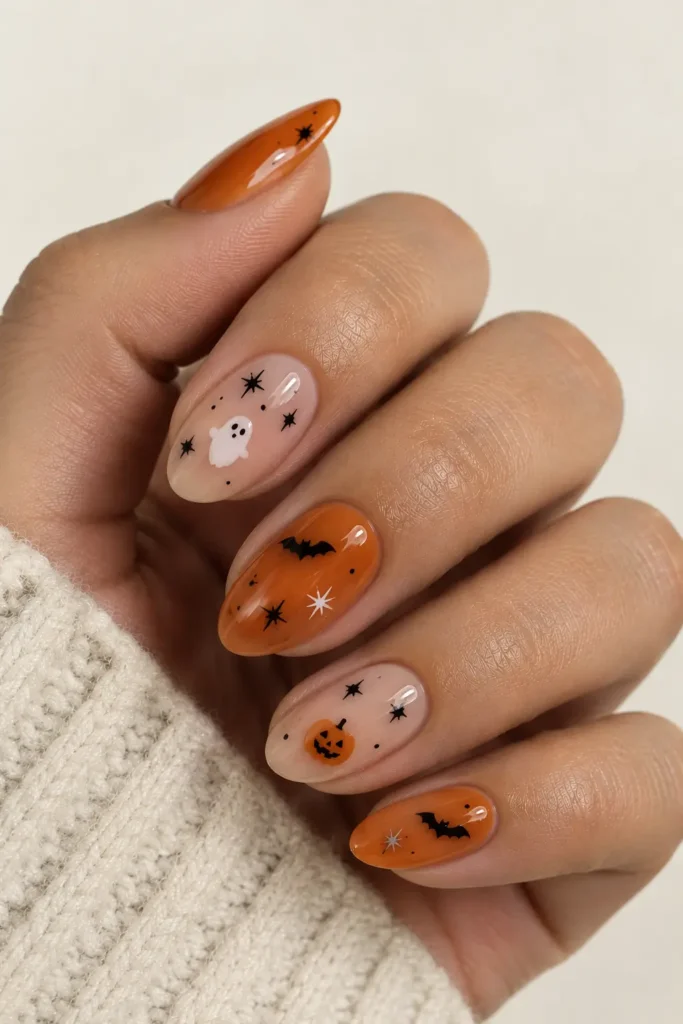
There is nothing wrong with skipping freehand nail art completely. Apply a nude, black, or orange base, add tiny Halloween nail stickers, and seal everything with a clear top coat. Choose small ghosts, bats, stars, pumpkins, or spiderwebs and keep the placement simple.
Best for: The fastest detailed-looking DIY manicure
Ask for at the salon: Simple nude, black, or orange base with tiny Halloween nail stickers sealed under top coat.
How to Make Easy Halloween Nails Look Better
- Use a sheer base when you are unsure. A nude or milky base makes small mistakes less noticeable and helps simple designs look cleaner.
- Keep the nail art small. Tiny ghosts, bats, dots, and stars are easier to paint than large designs and usually look more polished.
- Limit your color palette. Two or three colors — such as black, orange, and cream — can make even very simple nail art feel cohesive.
- Let each layer dry. Smudging is one of the easiest ways to ruin a simple design, especially when you are adding eyes, dots, or fine lines.
- Finish with top coat. A glossy top coat smooths small bumps, helps stickers stay in place, and makes beginner nail art look more finished.
What You Need for Easy Halloween Nails
You do not need a professional nail kit to recreate most of these ideas. A few basic supplies are enough for dozens of different Halloween looks.
- Base coat and top coat
- Black, white, orange, and red nail polish
- Sheer nude or pale pink polish
- Small dotting tool or toothpick
- Thin nail-art brush or old eyeliner brush
- Optional nail stickers, chrome powder, or matte top coat
Easy Halloween Nails for Short Nails
Short nails can work especially well for simple Halloween designs because small details look neat without needing much space. Black micro French tips, tiny ghosts, little hearts, dots, orange tips, and single accent nails are all easy choices.
If you want your nails to look a little longer, keep most of the base sheer and place the design near the tip or center rather than covering the whole nail.
Frequently Asked Questions
What are the easiest Halloween nails for beginners?
The easiest options are black French tips, orange French tips, Halloween skittle nails, tiny ghost accents, dotted nails, and sticker manicures. They use simple shapes and do not require detailed freehand painting.
Can I do Halloween nails on short nails?
Yes. Short nails work especially well with micro-French tips, tiny ghosts, dots, mini pumpkins, black hearts, and one-accent-nail designs because the artwork stays small and readable.
What colors work best for simple Halloween nails?
Black, orange, white, deep red, purple, olive green, and sheer nude are the most useful shades. A small two- or three-color palette usually looks cleaner than trying to fit every Halloween color into one manicure.
How can I make Halloween nail art easier at home?
Use dotting tools, toothpicks, a very thin liner brush, or nail stickers. Keep motifs small, let each layer dry before adding details, and finish with a glossy top coat to smooth the design.
What Halloween nails still look classy?
Try black micro-French tips, matte black nails, moon-and-star details, deep cherry blood-drip tips, or a pumpkin-orange chrome manicure. These keep the Halloween mood without looking overly costume-like.
Final Thoughts
The best easy Halloween nails are the ones you can recreate without turning your manicure into a full art project. Start with a simple base, choose one recognizable Halloween detail, and do not worry about making every nail identical.
Tiny ghosts, black French tips, orange dots, mini pumpkins, and mix-and-match designs can all give you the Halloween look with very little effort.
Whether you want something cute, spooky, minimal, or a little more dramatic, these ideas are simple enough to try at home and easy to customize with the colors and nail shape you already like. For more seasonal manicure inspiration, keep exploring MorningFable’s nail ideas and save your favorites for your next DIY manicure or salon appointment.
More Halloween Nail Inspiration
If you want more styles beyond beginner-friendly designs, explore our Halloween nail ideas guide. For a darker, polished look you can wear beyond the holiday, see these black French tip nail designs.