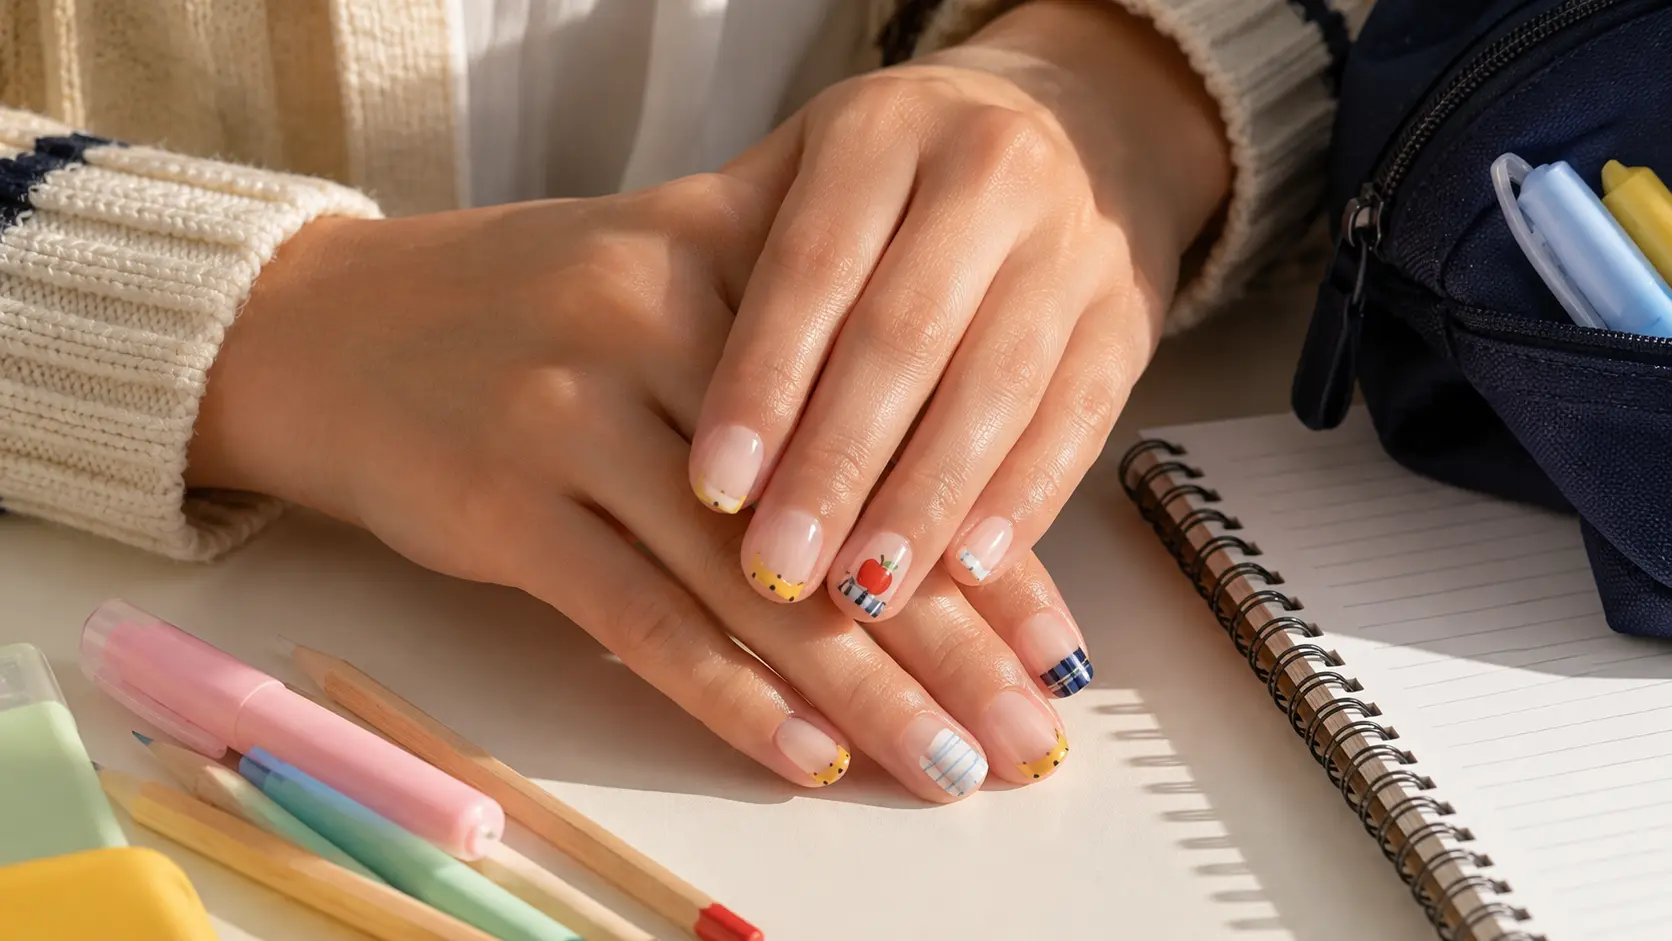

A fresh manicure can make the first day of school feel a little more exciting. Trying out new back-to-school nail is a small detail, but it can help you feel polished while planning your outfit, meeting a new class, returning to campus, or preparing your classroom.
However, not every manicure that looks impressive in a photograph is comfortable during a normal school week.
Extra-long extensions, oversized charms, and heavily embellished designs may catch on backpacks, clothing, hair, stationery, or sports equipment. Detailed artwork can also be difficult to repair when a nail chips.
While putting this guide together, I focused on back-to-school nail designs that would be easier to wear in everyday life. I looked for manageable nail lengths, flat artwork, simple touch-ups, and designs that remain recognizable on short nails.
You will find playful pencil and notebook back-to-school nail designs below, along with quieter options for college students, teachers, and anyone who prefers a polished manicure. For more beginner-friendly inspiration, explore these simple nail designs before choosing your school-week look.
How I Chose These Back-to-School Nail Ideas
I did not want this to become another list of designs that only look good in carefully staged close-ups.
I considered four practical questions:
- Would the design still look clear on short nails?
- Could it interfere with typing, writing, sports, or carrying a school bag?
- Would it be difficult to recreate or repair?
- Could it still look appropriate after the first week of school?
The easiest designs usually had three things in common: a manageable length, smooth painted details, and only one or two accent nails.
That is why this guide includes several French-tip, solid-color, and minimal-art options instead of relying entirely on complicated school-supply illustrations.
Quick Back-to-School Nail Guide
| Your Priority | Best Options |
|---|---|
| Short natural nails | Pencil tips, apple accents, stars, micro-French nails |
| Easy DIY manicure | Pastel nails, school colors, red nails with white dots |
| Subtle teacher nails | Plaid tips, navy and cream, milky nude nails |
| Low-maintenance design | Tortoiseshell, solid colors, colored French tips |
| Fun statement nails | Crayons, notebook art, chalkboard doodles |
| College-friendly manicure | Blue ink swirls, tortoiseshell, checkerboard accents |
1. Pencil-Inspired French Tips for Back-to-School Nails
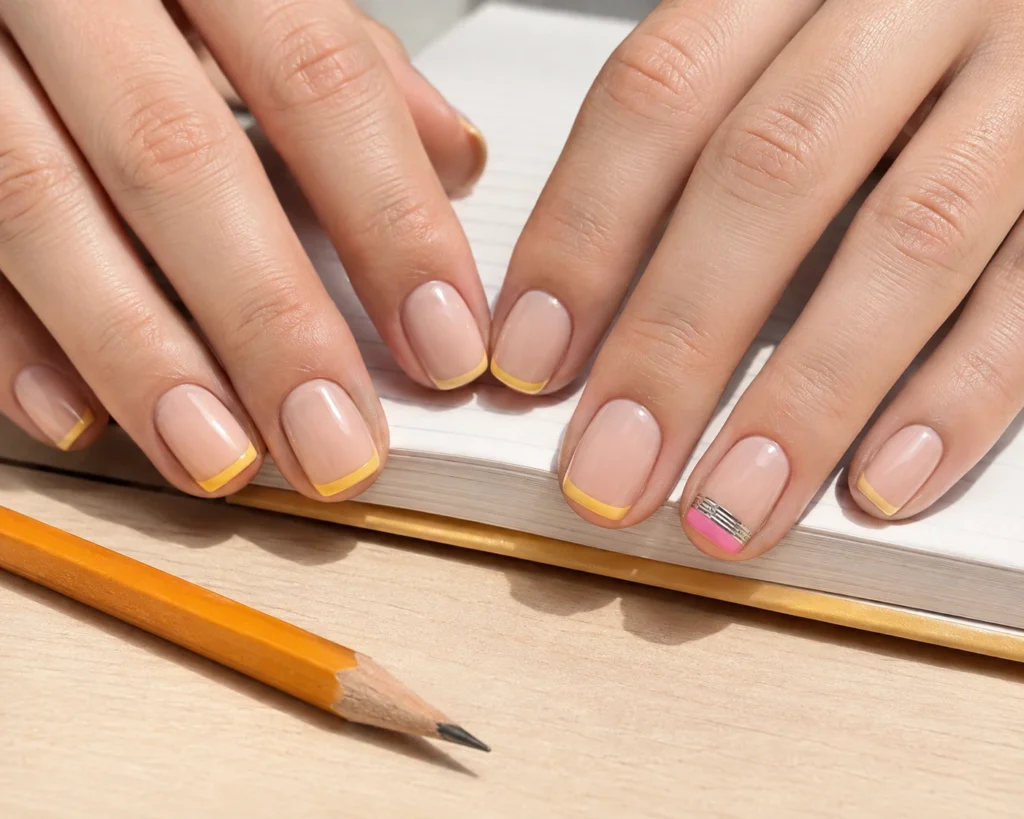
Pencil French tips are one of the most wearable ways to create a clear school-themed manicure.
Instead of painting a full pencil on every nail, use a thin yellow French tip over a sheer pink or nude base. Add a narrow silver line and a small pink section to one accent nail to represent the pencil’s metal band and eraser.
What makes this design useful is that it still looks neat from a distance. The school theme becomes visible when someone looks more closely, but the manicure does not feel like a costume.
It also works better on short nails than a detailed pencil illustration.
You can browse our collection of French-tip nail designs for more colorful and minimal variations.
Practical note: Keep the yellow section thin. A wide yellow tip can make short nails appear broader.
DIY difficulty: Moderate
Best nail shape: Short squoval or square
2. Tiny Apple Accent Nails
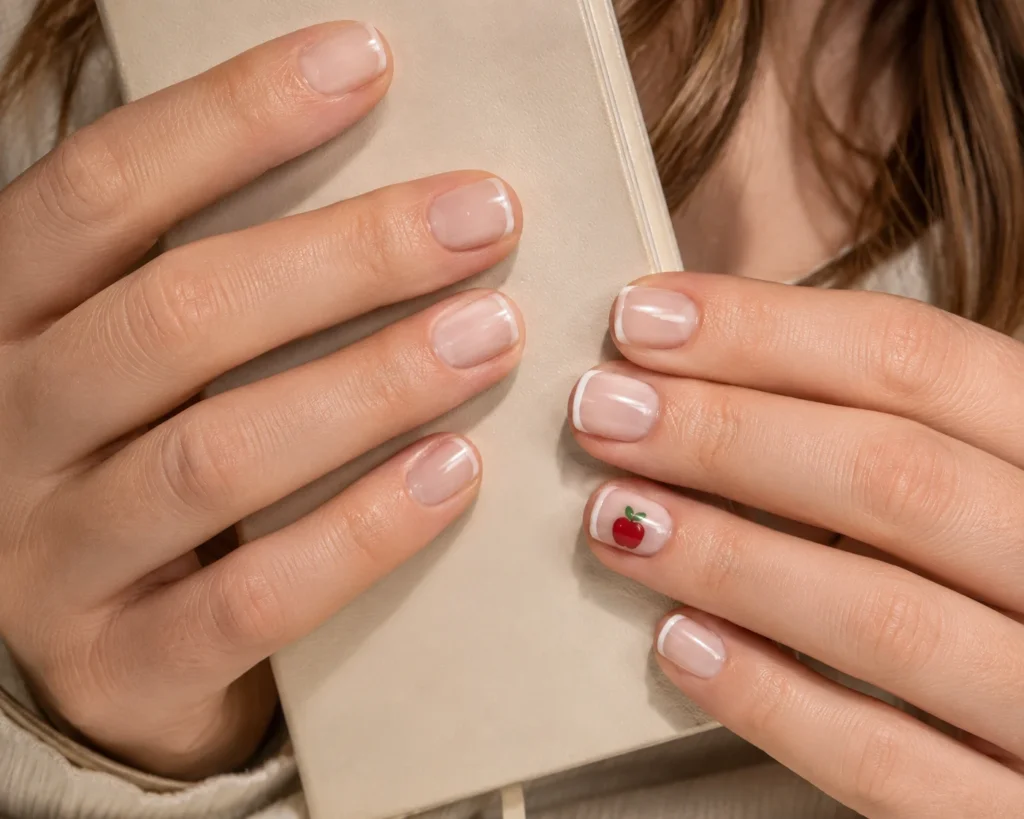
You do not need an apple on every finger to create recognizable back-to-school nails.
A small red apple on one ring finger can add enough detail to a nude, red, white, or French-tip manicure. Limiting the artwork to one or two nails also makes the design easier to repair.
The simplest apple designs often look the most polished. A small red shape, short brown stem, and one green leaf are usually enough.
Extra facial features, rhinestones, or raised decorations can make the manicure feel busier than necessary.
Practical note: On very short nails, place the apple near the center or cuticle rather than squeezing it onto the tip.
DIY difficulty: Easy to moderate
Best nail shape: Round, squoval, or almond
3. Lined Notebook Nails
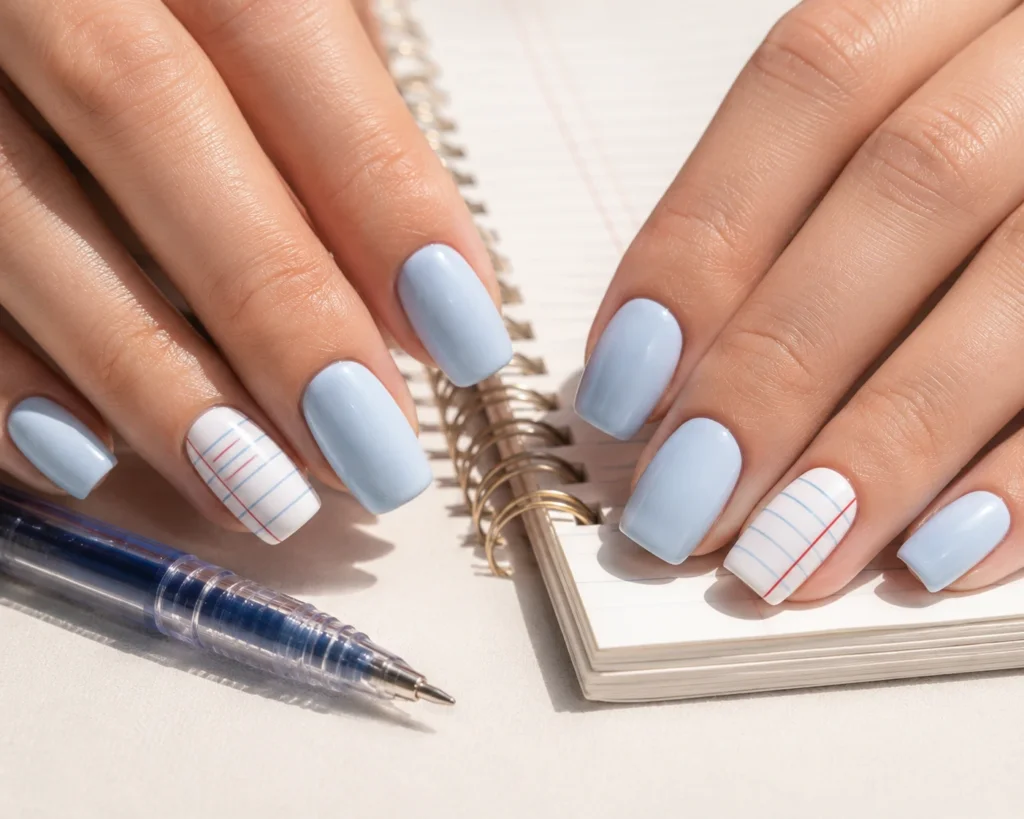
Notebook nails use a white or milky base with thin horizontal blue lines and one vertical red margin line.
The design is instantly recognizable, but it can become crowded when applied to every nail. A more wearable approach is to use notebook lines on two accent nails and paint the remaining nails blue, white, or nude.
This also reduces the amount of precision required. Painting evenly spaced lines across ten nails can be difficult, especially when working with your non-dominant hand.
A fine nail-art brush or thin striping tape will help you create cleaner lines. You could also combine the blue details with one of these elegant white nail ideas for a softer version of the notebook theme.
Practical note: A regular polish brush is usually too wide for clean notebook lines.
DIY difficulty: Moderate
Best nail shape: Square or squoval
4. School-Color Micro-French Back-to-School Nails
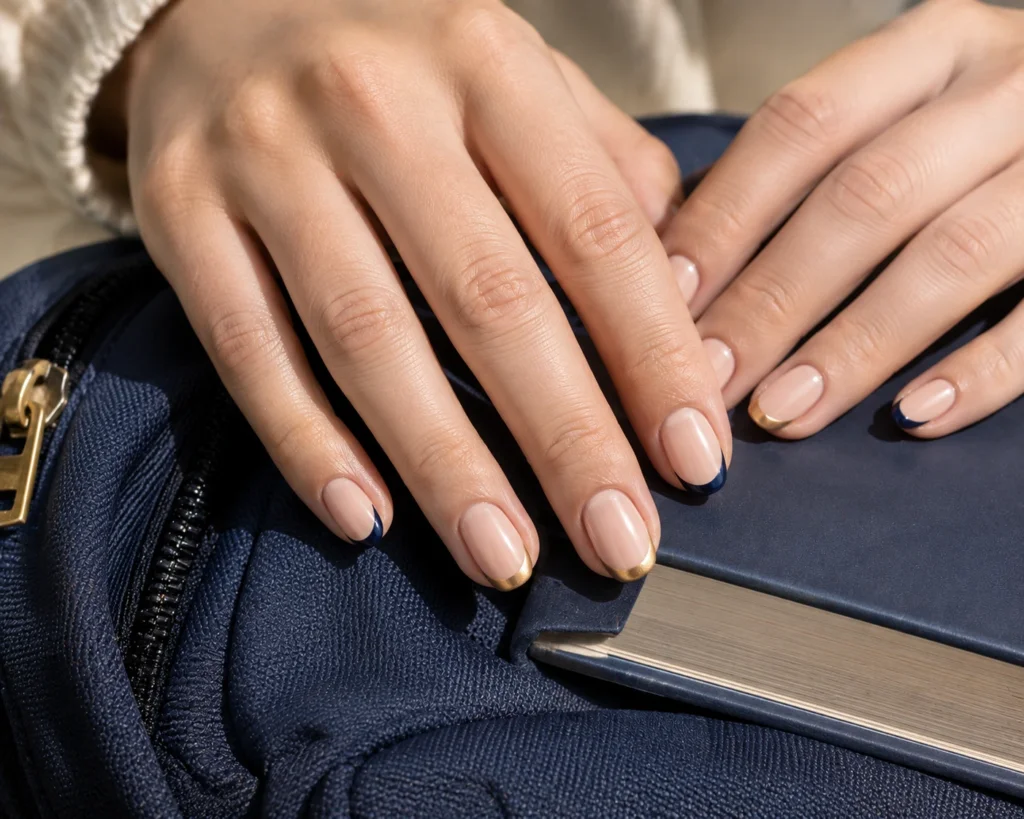
A micro-French manicure is an easy way to wear your school colors without creating literal classroom artwork.
Choose two colors and alternate them across the nail tips. A clear, beige, or pale pink base keeps the manicure balanced.
This is one of the most versatile options in the guide because it can work for students, teachers, college events, school games, and presentations.
It also grows out more naturally than a dark color applied across the entire nail. Minor chips along a thin tip are usually less noticeable and easier to repair.
Practical note: Limit the design to two or three colors. Too many shades can make the tips look inconsistent.
DIY difficulty: Moderate
Best nail shape: Any short or medium shape
5. Navy and Cream Minimal Nails
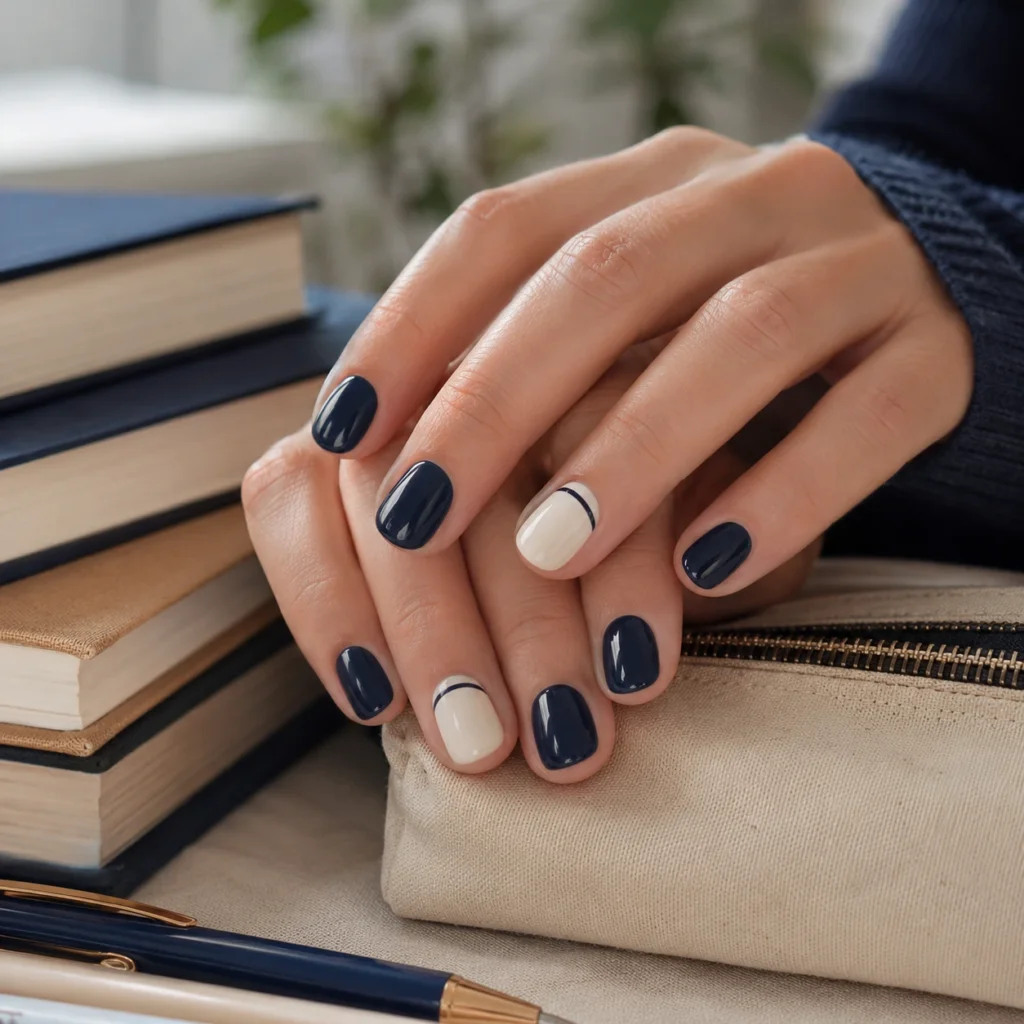
Navy and cream create a classic academic palette without relying on pictures of pencils, apples, or notebooks.
Paint most nails navy and use cream on one or two accent nails. A small navy dot, stripe, or curved French tip can connect the two colors.
This option is especially practical because it will not feel outdated immediately after the first day of school. The colors can transition easily into fall.
Dark navy polish may show chips more clearly, so remember to apply topcoat across the free edge.
Practical note: Apply two thin navy coats instead of one thick coat to keep the cuticle area clean.
DIY difficulty: Easy
Best nail shape: Short round, squoval, or almond
6. Plaid French Tips
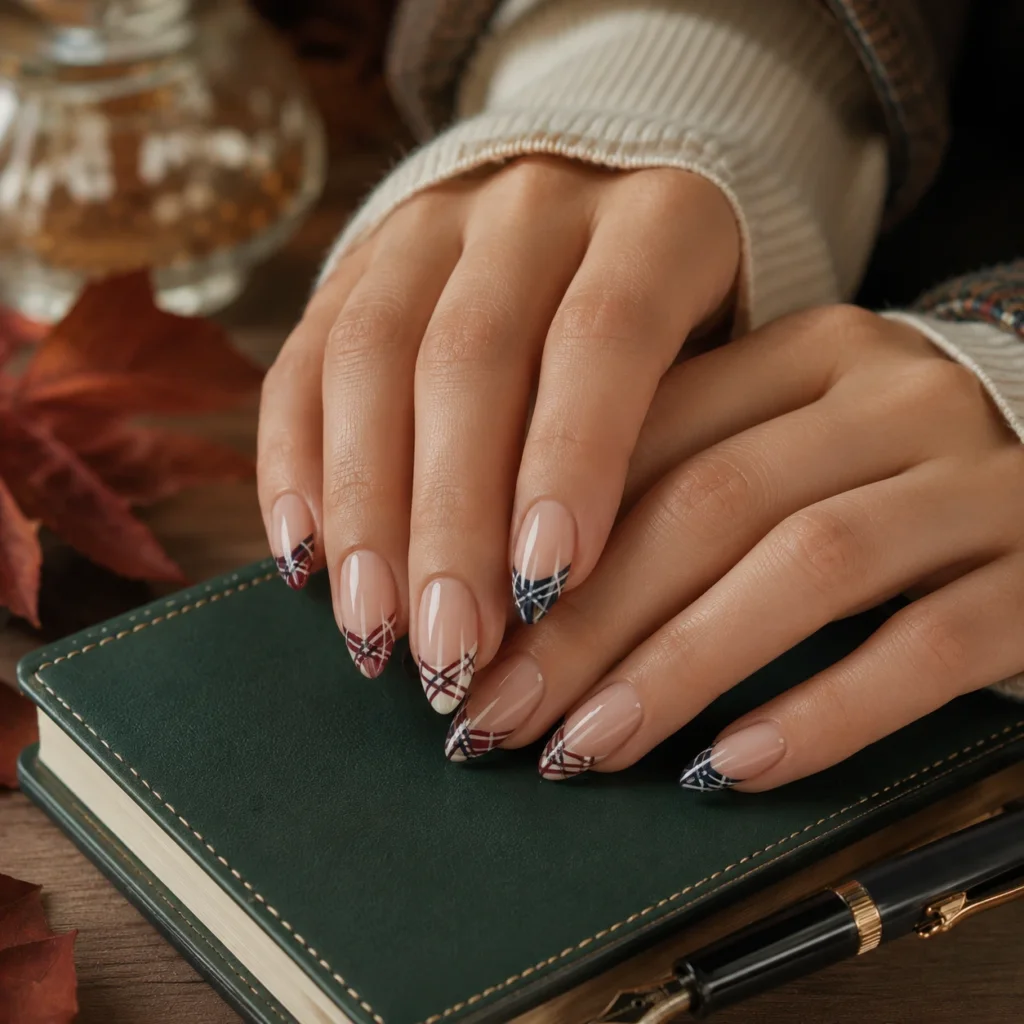
Plaid patterns can create a preppy, school-inspired manicure, especially when you use navy, burgundy, forest green, cream, or tan.
Full plaid nails may look crowded, so I recommend keeping the pattern on the tips or limiting it to one accent nail. Thin lines generally appear cleaner than large blocks of color.
On short nails, simplify the plaid to two crossing lines. Detailed tartan patterns need more space and usually work better on medium-length nails.
Practical note: Use a sheer neutral base so the plaid remains the main feature.
DIY difficulty: Advanced
Best nail shape: Medium almond or square
7. Pastel Highlighter Nails
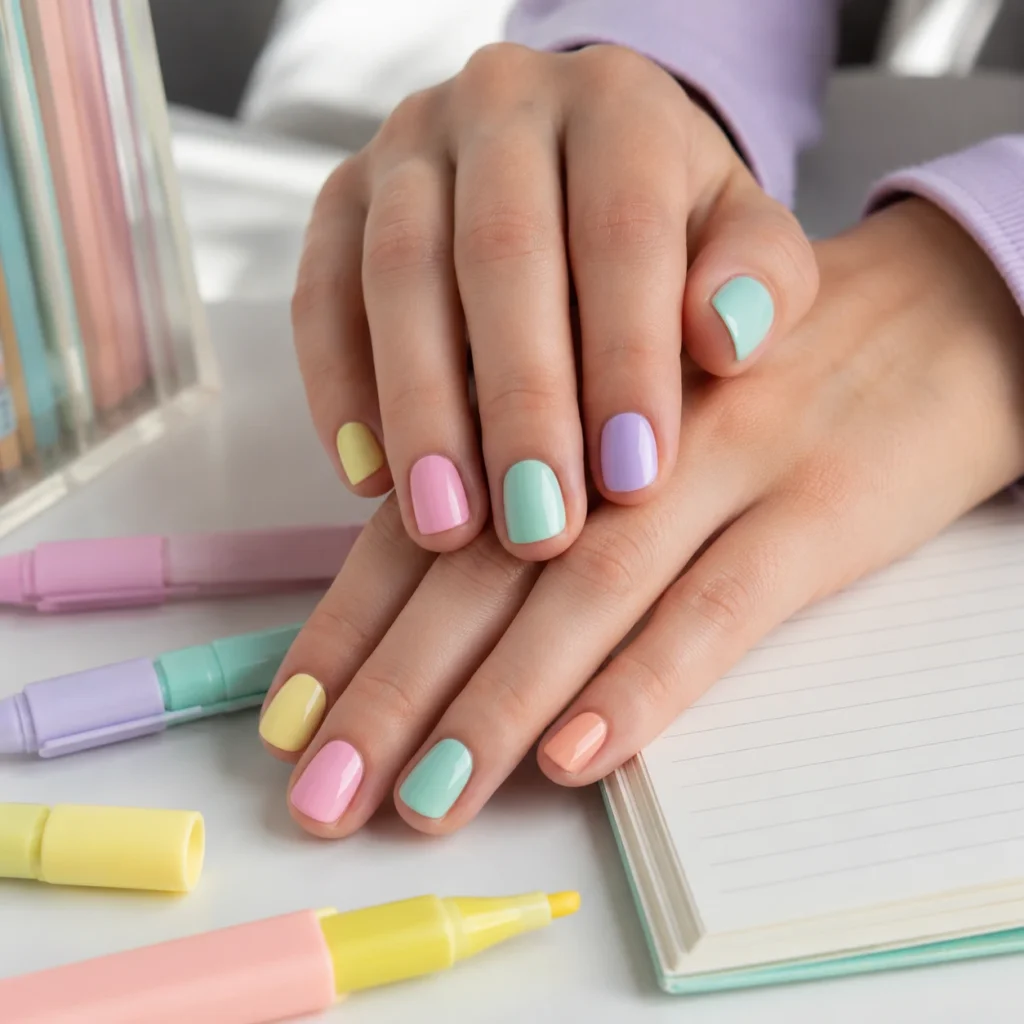
Pastel highlighter nails are among the easiest designs to recreate at home.
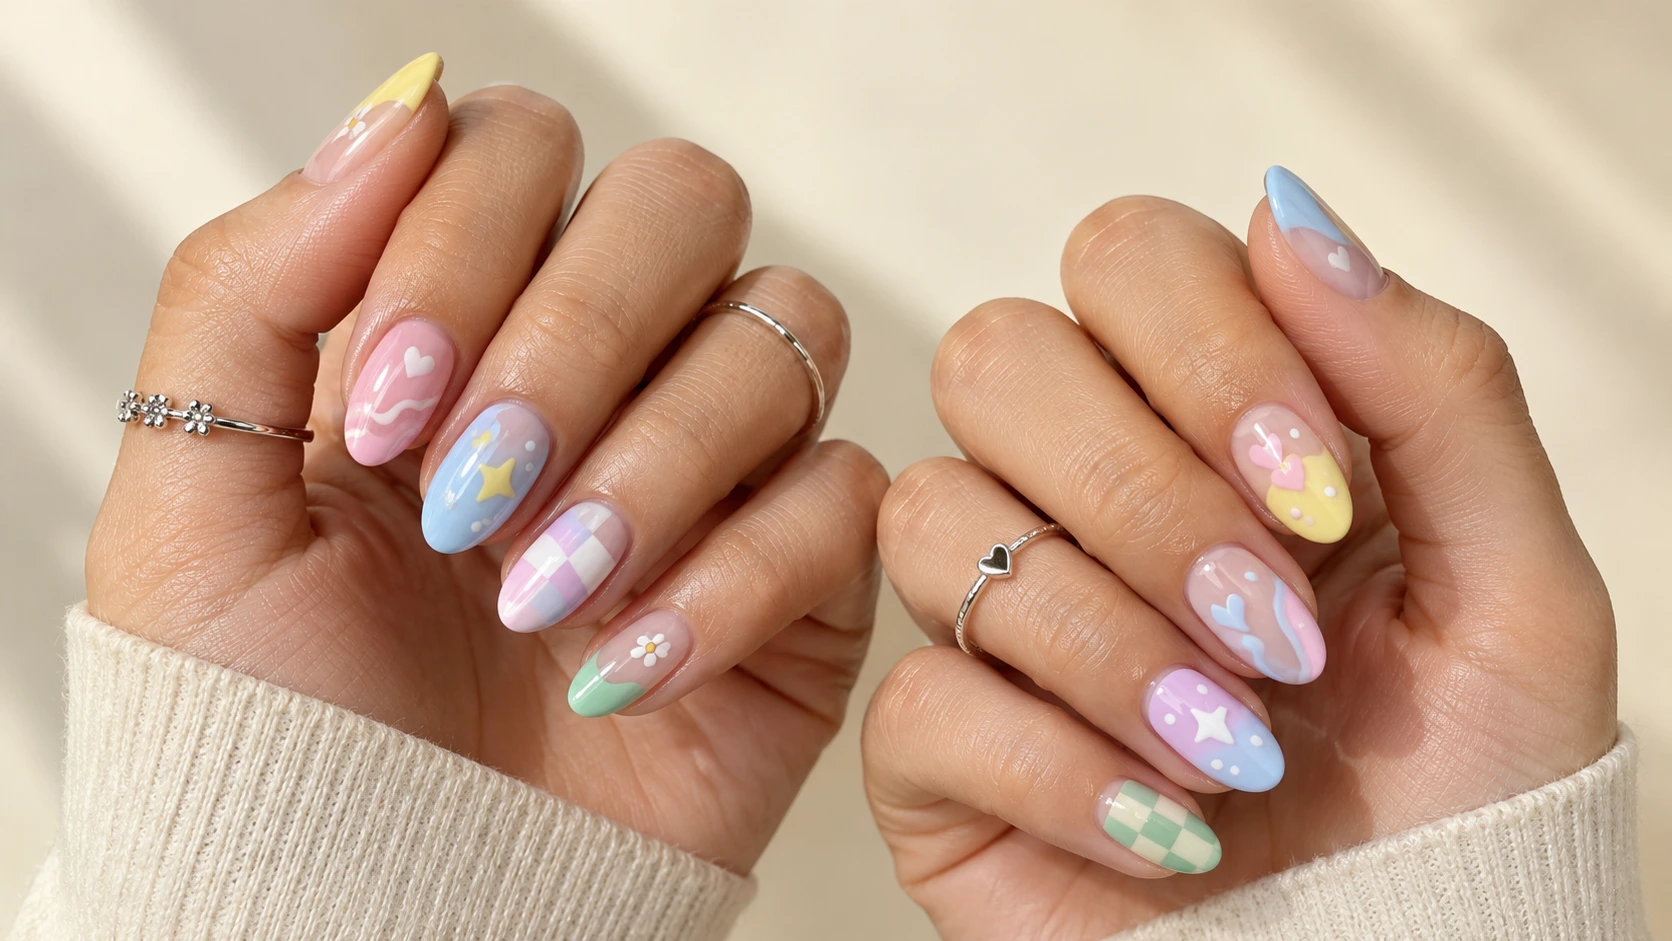
Paint each nail a different soft shade, such as pale yellow, pink, mint green, lavender, blue, or peach. The color combination references school stationery without requiring detailed artwork.
Bright neon polish can sometimes be difficult to apply evenly. Softer pastel or jelly formulas are usually more forgiving and help reduce the appearance of streaks.
This is a good option when you want to paint your nails the night before school and do not have time for complicated illustrations.
Practical note: Apply two or three thin coats rather than one heavy coat.
DIY difficulty: Easy
Best nail shape: Any length or shape
8. Chalkboard Doodle Nails
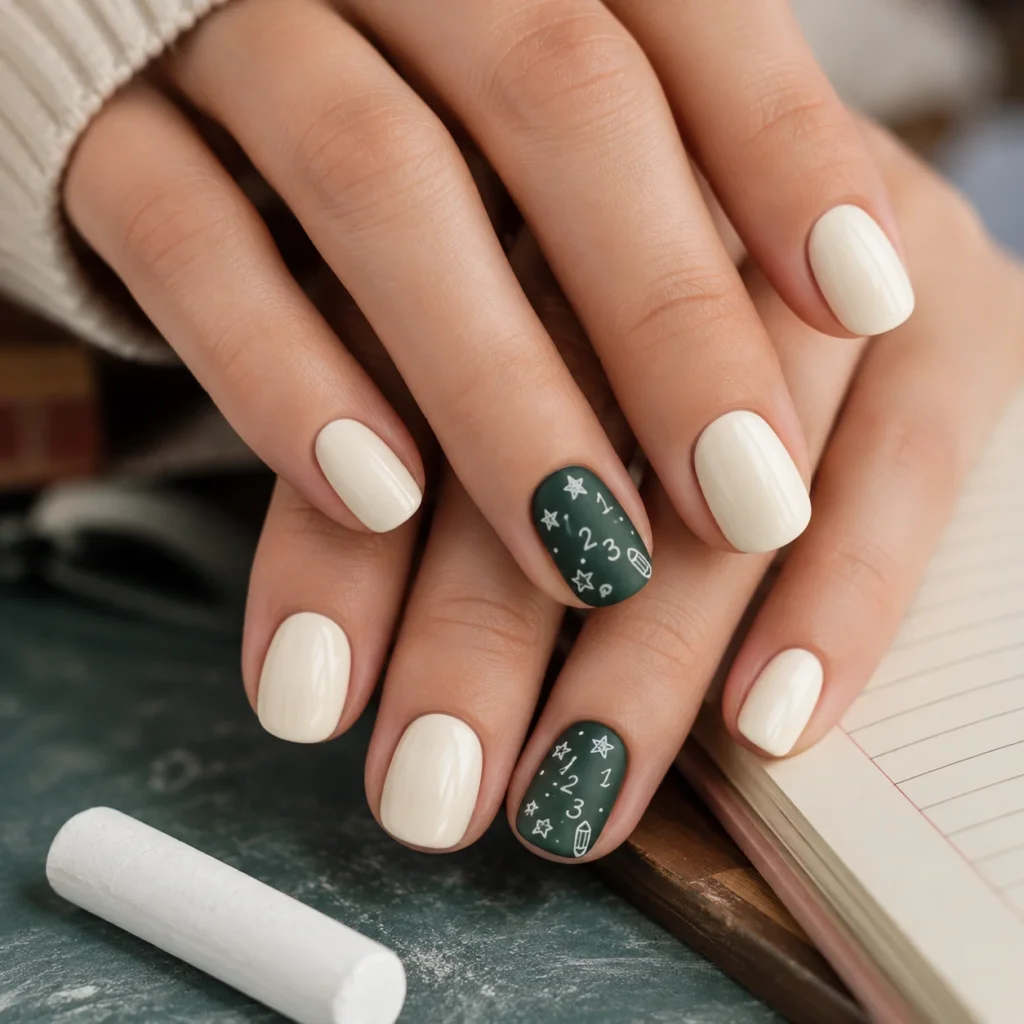
A matte black or deep green base can resemble a classroom chalkboard.
Add tiny white stars, numbers, hearts, letters, or simple equations using a fine nail-art brush. The design looks best when limited to one or two accent nails.
When too many small drawings are placed close together, they become difficult to recognize. Leaving open space between the doodles produces a cleaner result.
A matte topcoat strengthens the chalkboard effect, although it may show oil or hand cream marks more quickly than a glossy finish.
Practical note: Paint the remaining nails cream, black, green, or white to prevent the set from looking overloaded.
DIY difficulty: Advanced
Best nail shape: Medium square or almond
9. Red Nails With White Dots
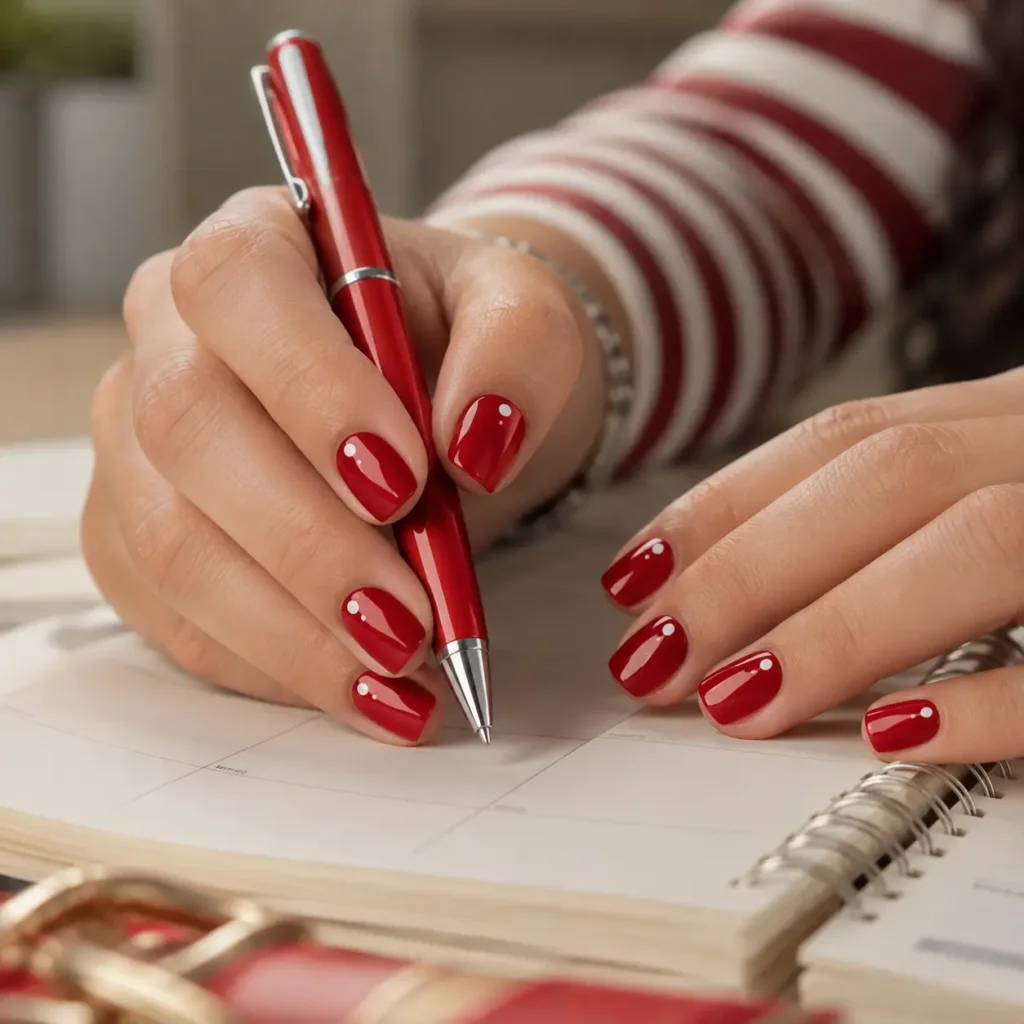
Glossy red nails are simple, bold, and easy to connect with the back-to-school season. The color can reference apples, red pens, and traditional school supplies.
Add a few small white dots to one accent nail or place the dots near the cuticle of each nail.
This design is easier to maintain than detailed artwork. When the polish chips, you only need to repair the red base rather than recreate a complicated illustration.
A slightly deeper red will also transition more naturally into fall than a bright summer red.
Practical note: Create the dots with a dotting tool, clean bobby pin, or the rounded end of a small brush.
DIY difficulty: Easy
Best nail shape: Short round or squoval
10. Blue Ink Swirl Nails
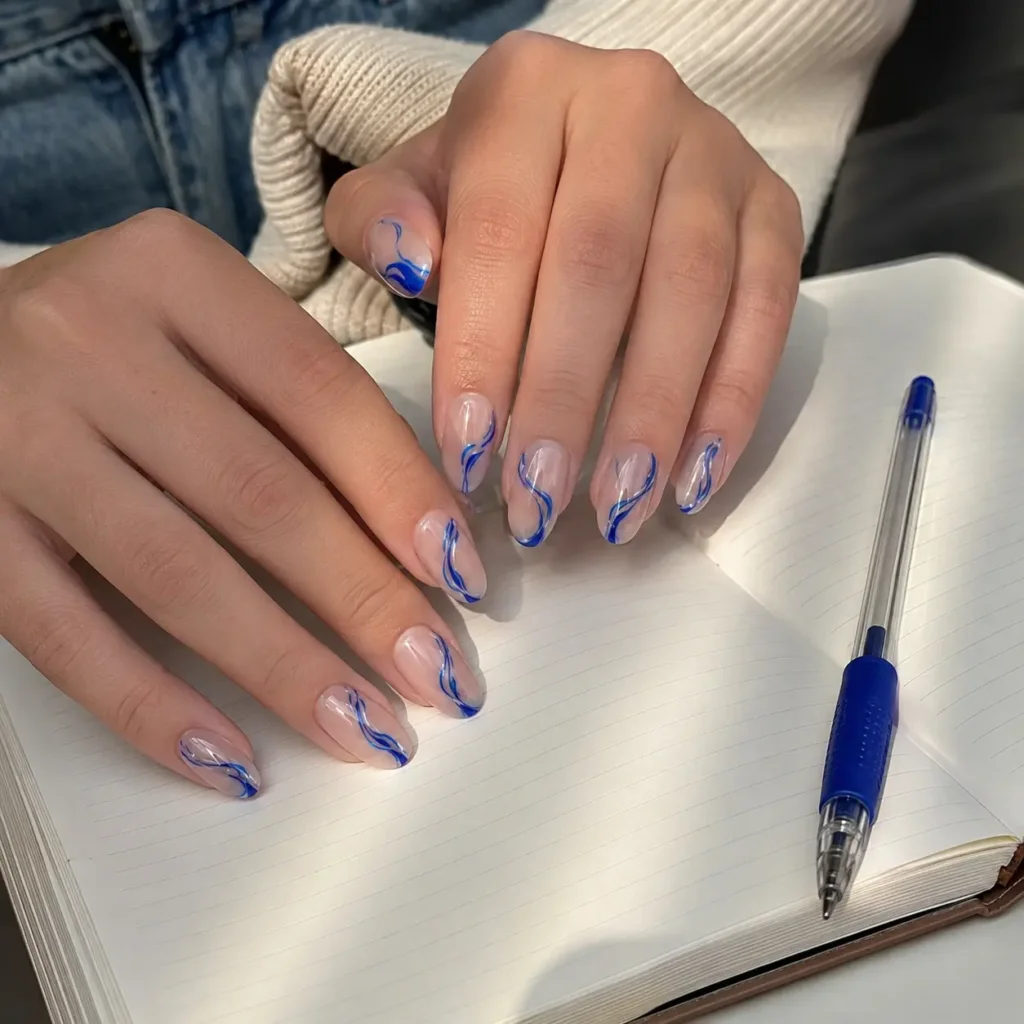
Blue swirl nails offer a more abstract interpretation of the school theme.
Use a sheer nude base and add thin royal-blue or pale-blue lines that resemble flowing pen ink. Each nail can feature a slightly different curve.
The design usually looks more polished when some nails contain only one line. Filling every nail with several swirls may make the manicure appear crowded.
This is one of the strongest options for college students because it feels creative without looking overly literal.
Practical note: Leave enough negative space around the blue lines.
DIY difficulty: Moderate
Best nail shape: Almond, oval, or squoval
11. Minimal Star Nails
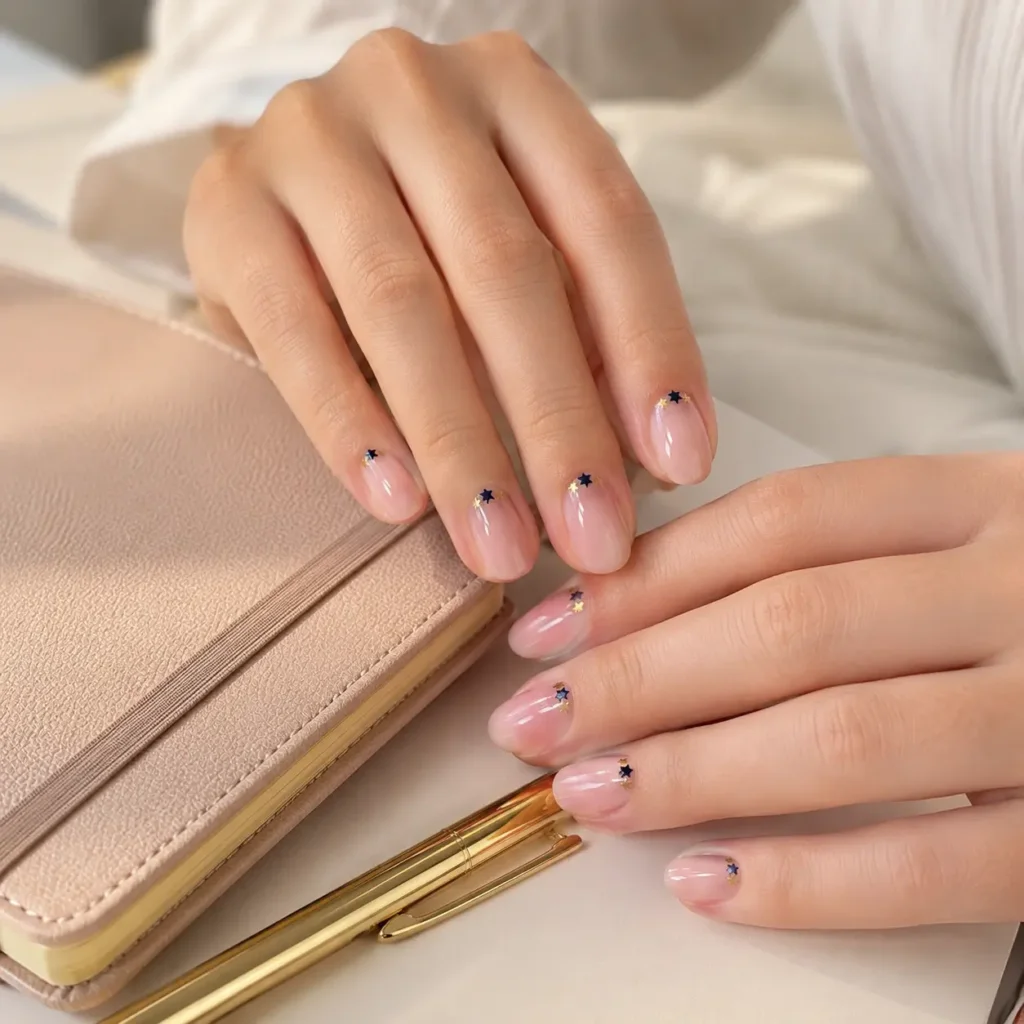
Tiny stars can represent fresh goals, new beginnings, and the start of a new academic year without using obvious school symbols.
Add one navy, gold, silver, or white star near the cuticle of each nail. You could also keep most nails plain and create a small cluster on one accent finger.
This design works particularly well on short nails because the artwork does not require much space.
For more stars, clouds, smiley faces, and playful miniature details, browse these whimsy nail ideas.
Practical note: Thin nail stickers are easier to seal than large glitter pieces or raised decorations.
DIY difficulty: Easy with stickers
Best nail shape: Short round or almond
12. Library-Inspired Tortoiseshell Nails
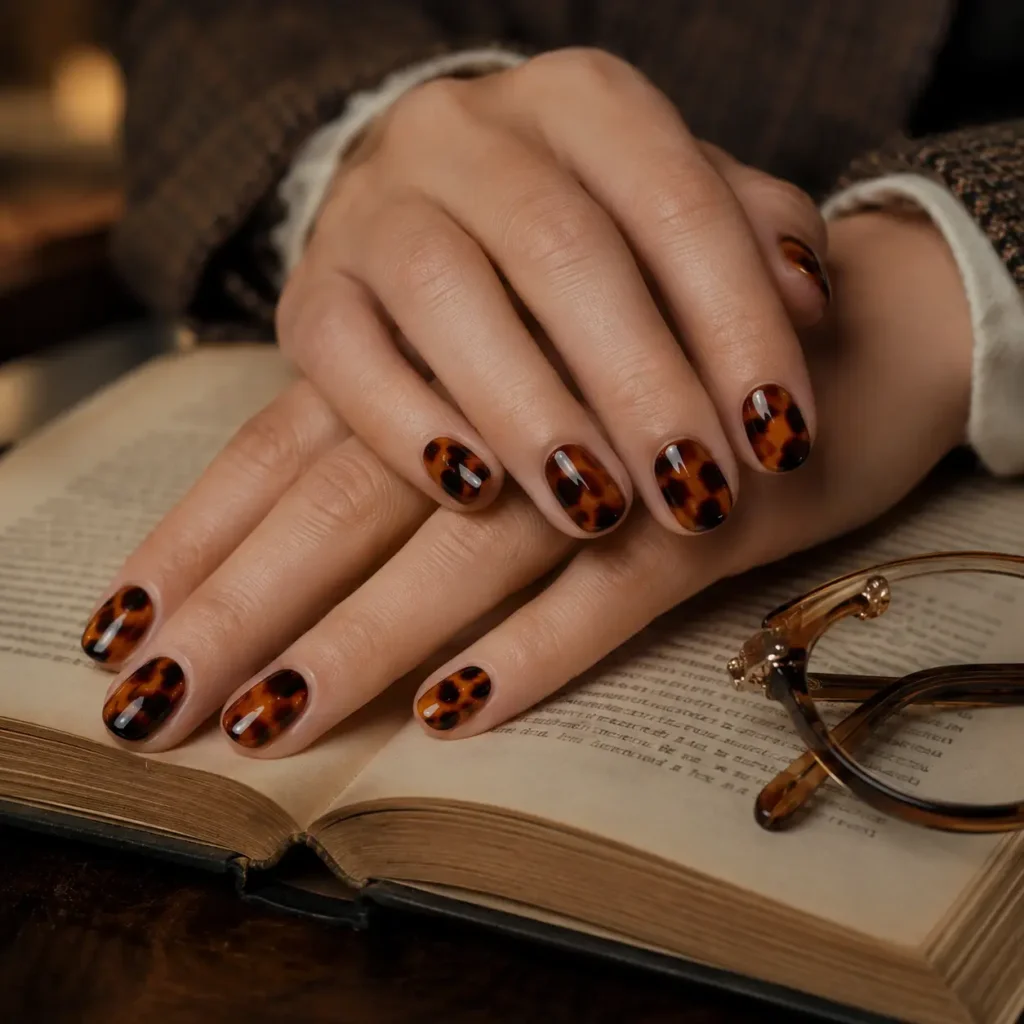
Tortoiseshell nails are not an obvious school design, but they create a warm academic look inspired by vintage glasses, old books, wooden shelves, and quiet library afternoons.
The pattern normally combines amber, caramel, brown, and small black details. Because it already includes several tones, it does not need rhinestones or additional drawings.
Tortoiseshell can also hide small imperfections better than a flat, light-colored manicure. Natural variation is part of the design.
This style is ideal when you want something that feels appropriate for the beginning of the school year but can continue into autumn. You can also explore these wearable fall nail colors for more warm brown, green, orange, and neutral options.
Practical note: Apply the brown and black details in irregular shapes rather than perfectly even dots.
DIY difficulty: Moderate to advanced
Best nail shape: Short square, almond, or oval
13. Smiley-Face Sticker Nails
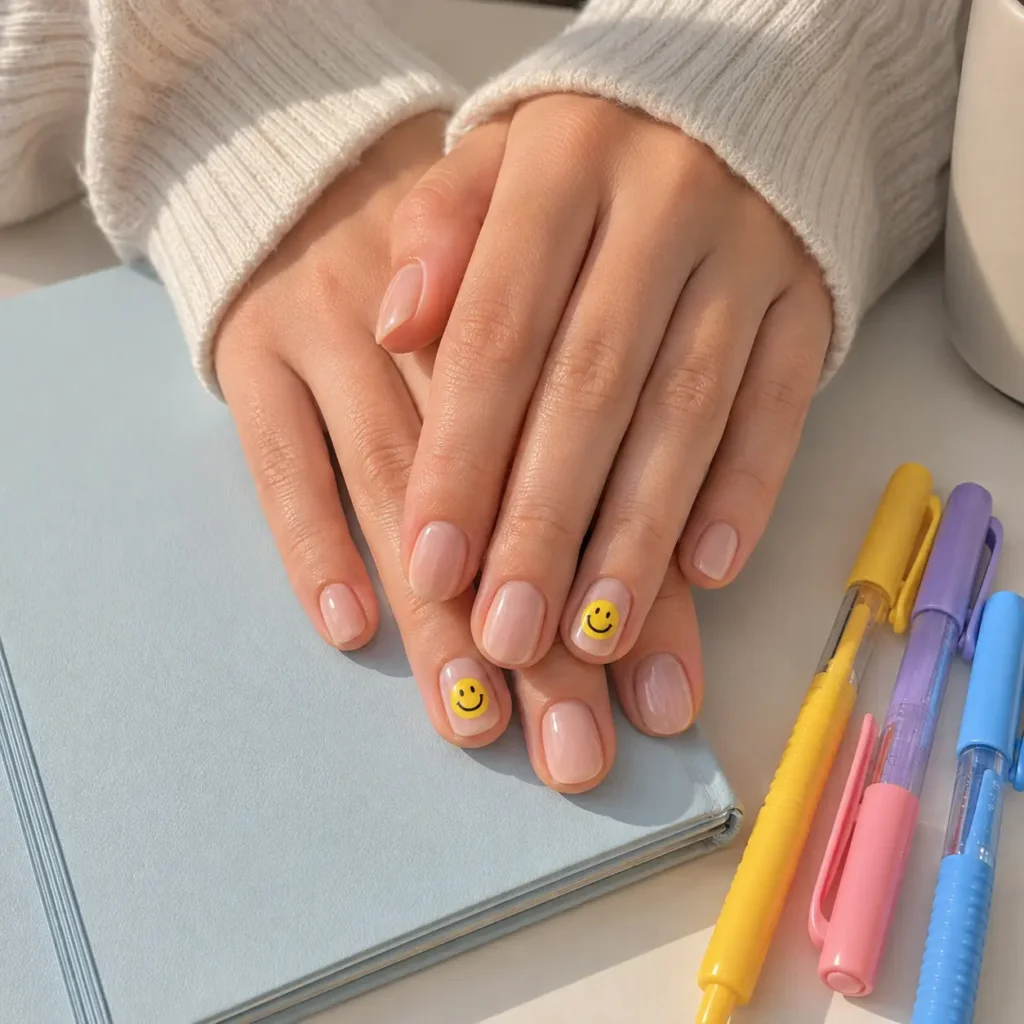
Small smiley faces create a cheerful first-day manicure without requiring advanced painting skills.
Use a clear, nude, pale pink, or light blue base. Add one miniature smiley sticker to two or three nails rather than covering the entire manicure.
Sticker edges are the main weakness of this design. They may begin to lift when exposed to water, hand cream, or friction inside a school bag.
Press each sticker down firmly and seal it with two thin layers of topcoat.
Practical note: Leave a small gap between the sticker and the nail edge so it is easier to seal.
DIY difficulty: Easy
Best nail shape: Short or medium nails
14. Milky Nails With Tiny Red Details
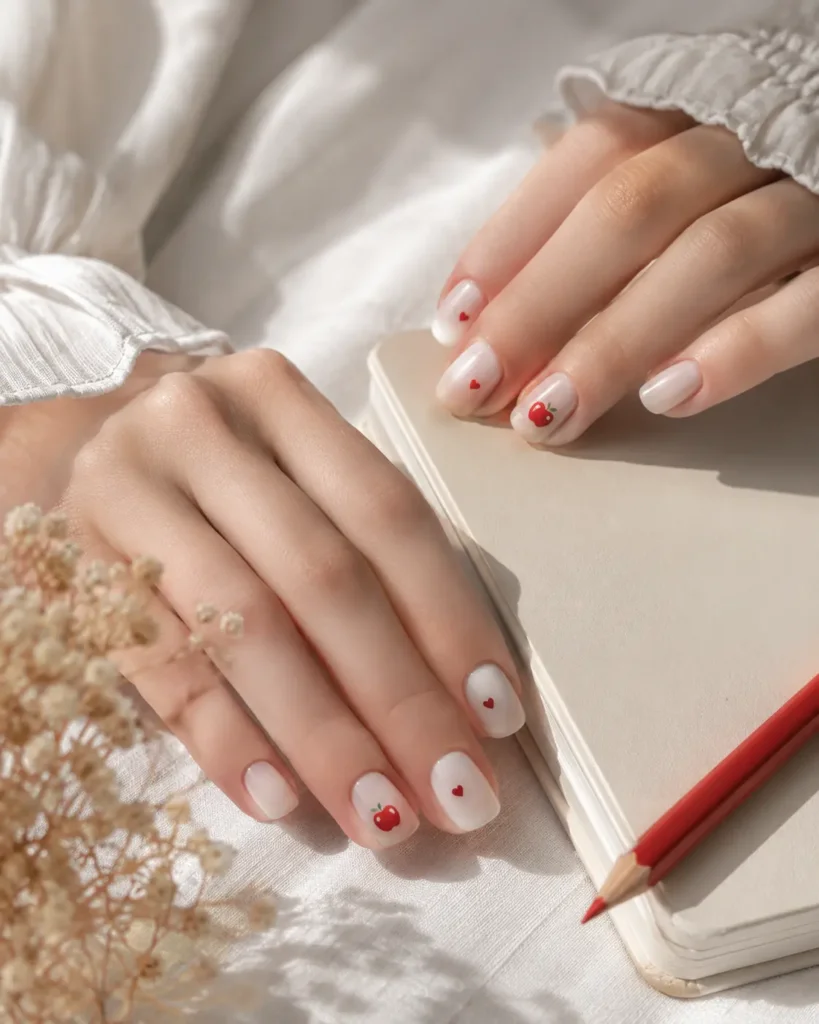
Milky nude or white nails create a clean background for miniature red hearts, apples, dots, bows, or stars.
This is one of the most versatile designs in the guide. It can work for school, college, work, and weekend plans without feeling tied to one outfit.
The semi-sheer base also grows out more softly than opaque white polish.
For an even cleaner version, use the glossy translucent finish featured in our guide to soap nails, then add one tiny red accent.
Practical note: Choose one type of red detail instead of combining hearts, bows, apples, and stars on the same hand.
DIY difficulty: Easy to moderate
Best nail shape: Any short or medium shape
15. Mix-and-Match School Supply Nails
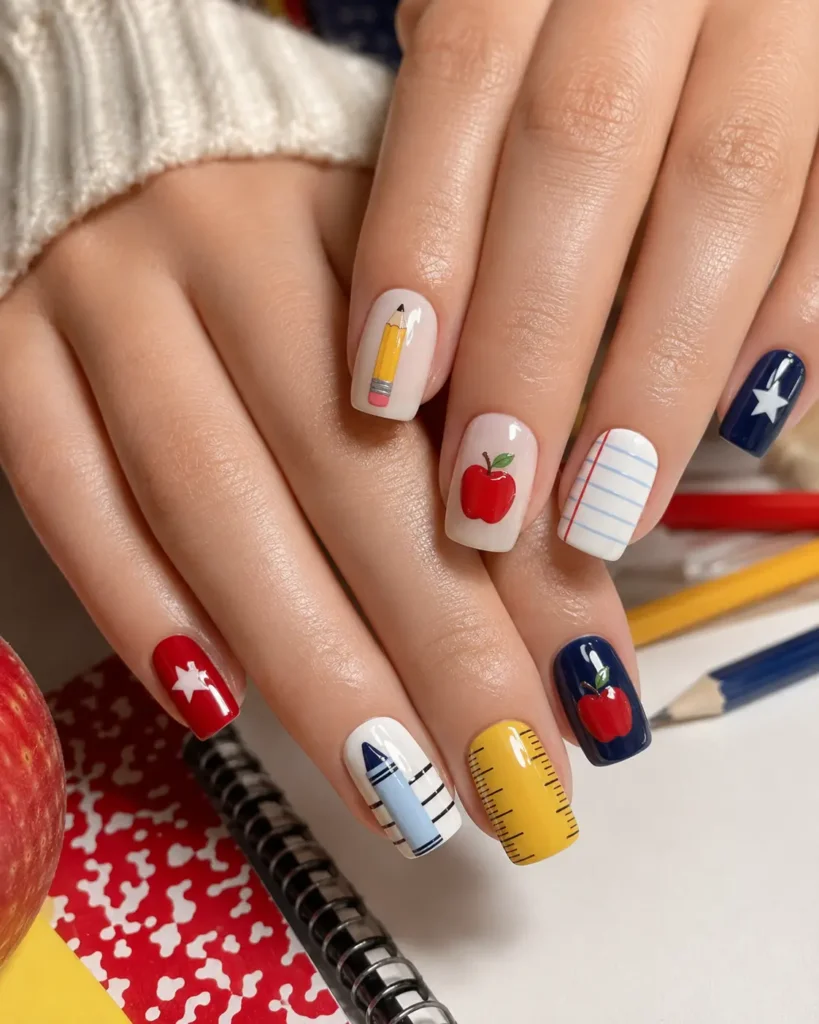
A mix-and-match manicure can feature a pencil, apple, notebook page, ruler, star, letter, or crayon.
This is the most detailed option in the guide. The key is to limit the color palette. Repeating three or four colors across the set helps the individual designs feel connected.
I would choose flat painted artwork instead of three-dimensional charms. Raised rulers, pencils, bows, and gems may look interesting in photographs, but they are more likely to catch on clothing or become uncomfortable.
Because each nail is different, repairs may also take longer.
Practical note: Decide which design will appear on each finger before beginning the manicure or visiting your nail artist.
DIY difficulty: Advanced
Best nail shape: Medium square or almond
My Three Most Practical Back-to-School Nail Choices
After comparing the designs for daily wear, these are the three options I would recommend for a normal week of typing, writing, carrying bags, and completing everyday tasks.
School-Color Micro-French Nails
The design is customizable but still subtle. It works on almost any nail length and is easier to repair than detailed artwork.
Milky Nails With One Small Accent
A semi-sheer base grows out naturally and coordinates with most outfits. One tiny apple, star, or red heart provides enough seasonal character.
Navy and Cream Short Nails
The colors feel academic and polished without becoming overly playful. The manicure will also continue to work after the first week of school.
How to Create an Easy Pencil Accent Back-to-School Nail
Instead of attempting detailed artwork on all ten nails, start with one simple pencil accent.
What You Need
- Base coat
- Sheer nude or pale pink polish
- Yellow polish
- Silver polish
- Pink polish
- Fine nail-art brush
- Glossy topcoat
Instructions
1. Clean your nails and remove old polish.
2. Apply one thin layer of base coat.
3. Paint each nail with one or two coats of sheer nude polish.
4. Paint one accent nail yellow.
5. Allow the yellow polish to dry completely.
6. Add a thin silver band near the tip.
7. Paint the end pink to create the eraser.
8. Finish with a glossy topcoat.
9. Run the topcoat brush gently across the free edge of each nail.
The most common mistake is adding the silver and pink details before the yellow polish has dried. This can drag the base and create muddy lines.
When working with your non-dominant hand, rest both hands on a table instead of holding them in the air. This provides more control.
Once you are comfortable creating one accent nail, adapt the technique using stars, dots, flowers, or colored tips from our collection of easy nail designs.
How to Make Your Manicure Last Through the School Week
Begin With Clean Nails
Remove hand cream, oil, and old polish before applying the base coat. Polish may lift sooner when the nail surface is oily.
Apply Thin Coats
Several thin layers normally dry more evenly than one heavy coat. Thick polish may remain soft underneath even when the surface feels dry.
Keep the Artwork Flat
Painted designs and thin stickers are usually more practical than bulky charms, gems, and raised decorations.
Seal the Nail Tips
Apply a small amount of topcoat across the free edge of each nail. This is where polish frequently begins to wear.
Wear Gloves While Cleaning
Water and cleaning products can weaken polish and dry the skin around your nails. Gloves are useful when washing dishes or cleaning your room.
For more on keeping your nails and cuticles healthy between manicures, see these dermatologist-approved manicure care tips from the American Academy of Dermatology.
Keep the Main Polish Color
Save the base color for quick touch-ups. Solid colors and minimal accent nails are much easier to repair than complicated illustrations.
What to Ask Your Nail Artist for Back-to-School Nail
Take reference images to your appointment, but also explain how you use your hands during the day.
Mention whether you type frequently, play sports, work with children, attend practical classes, or need to follow a dress code.
A nail artist may be able to simplify the design, shorten the length, or replace raised decorations with painted details.
Useful questions include:
- Can this design work on my natural nail length?
- We keep the artwork flat?
- Can we use only one or two accent nails?
- Which shape will be easiest to maintain?
- Can we use my school colors without including a logo?
- Will the pattern remain visible on short nails?
Adding Genuine First-Hand Experience to Your Back-to-School Nail
First-hand content should come from a real test, not a made-up personal story.
Before publishing, recreate one of the easier designs on natural nails, press-ons, or a nail wheel. Photograph the process and record:
- The products you used
- The total time required
- The approximate cost
- Which step was most difficult
- How the manicure looked after five to seven days
- Whether it interfered with typing or daily tasks
- What you would change next time
You can then include a section like this with your real observations:
Tips Before You Try the Pencil Accent Design
The pencil accent design is easiest to create on a light nude or cream base, as it helps the pencil details stand out. Using a thin nail art brush or nail art pen makes it much easier to create the silver ferrule, pink eraser, and sharpened pencil tip with clean lines.
To help the design last longer, apply a quality base coat before painting and finish with a glossy top coat to protect the artwork from everyday wear. If you’re new to nail art, practicing the pencil accent on a press-on nail or nail wheel first can help you perfect the proportions before painting your full manicure.
Although the design includes several small details, it remains practical for everyday activities because the artwork lies flat on the nail and doesn’t add texture or embellishments that can catch while typing or doing daily tasks.
Frequently Asked Questions About Back-to-School Nail
More Back-to-School Nail Ideas You May Like
- Simple Nail Designs: Cute and Easy Ideas to Try
- French Tip Nail Designs for Every Style
- Elegant White Nail Ideas for a Clean Manicure
- 20 Playful Whimsy Nail Ideas
Final Thoughts on Back-to-School Nail
The best back-to-school manicure is not necessarily the most detailed one.
Choose a design that fits your nail length, daily activities, skill level, and school rules. A small apple, colored French tip, or simple plaid accent may be more useful than a full set of complicated school-supply illustrations.
For the most practical result, keep the nails short or medium, use flat artwork, and limit detailed designs to one or two fingers.
A manicure that remains comfortable and presentable throughout the week will usually feel more satisfying than an elaborate set that becomes difficult to manage after the first day.
For an especially simple option, try a glossy neutral finish inspired by our soap nail tutorial or adapt one of our modern French-tip ideas using your school colors.
More Nail Inspiration
For more polished options, explore our French tip nail designs and green nail ideas for colors and shapes that can work beyond the school week.