
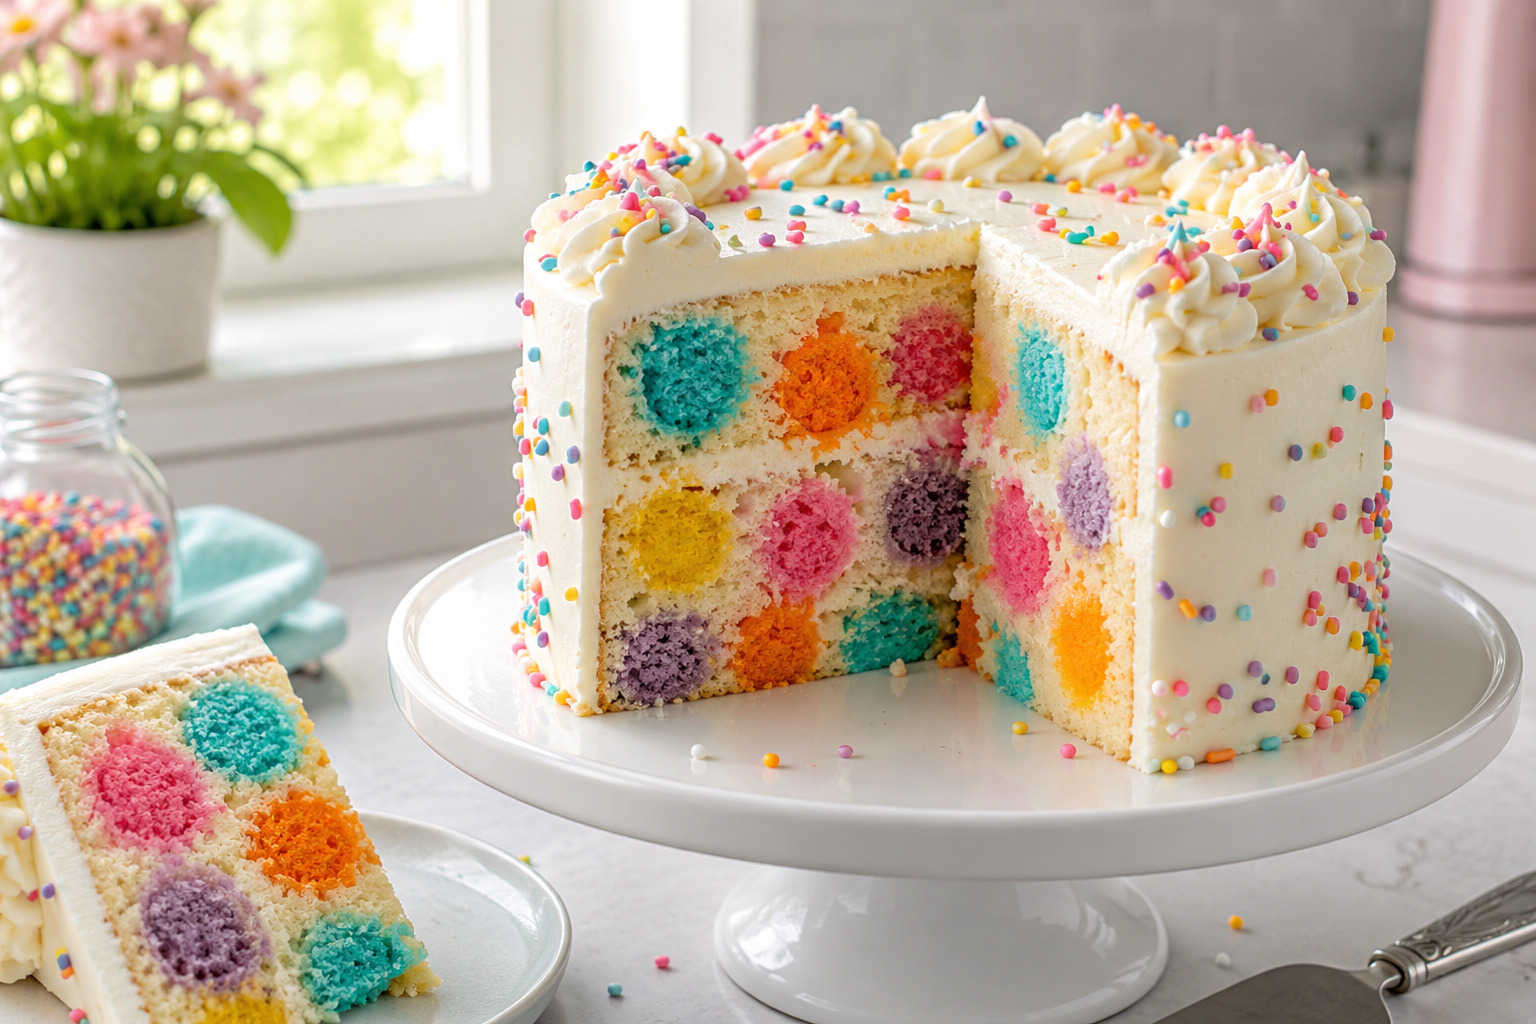
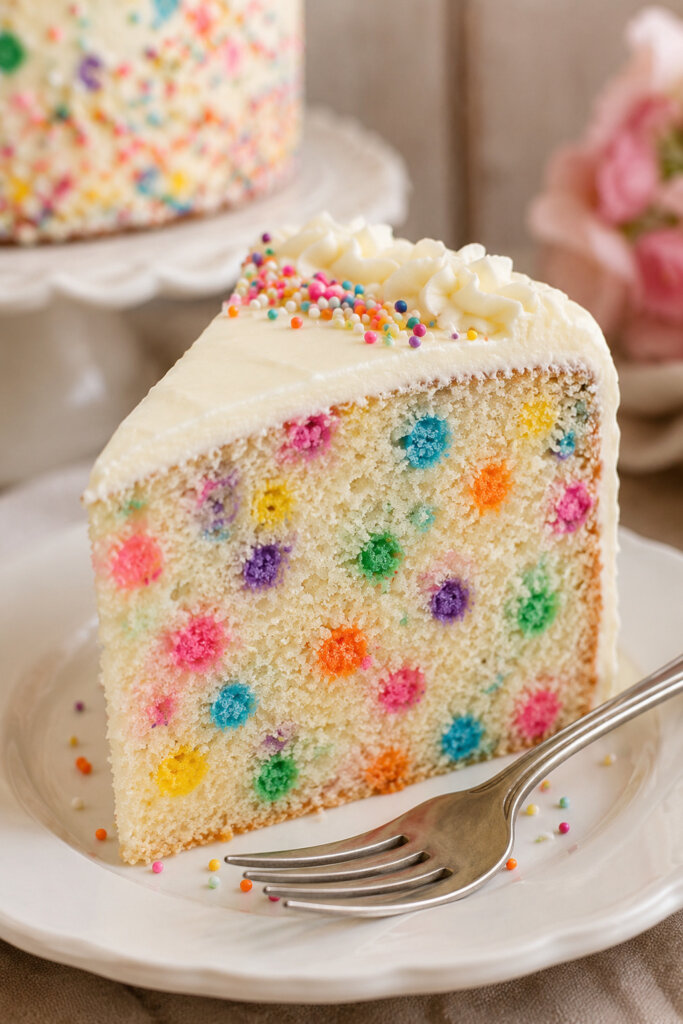
Dot cake is one of those desserts that looks simple from the outside but turns into a fun surprise when you cut the first slice. Inside the soft sponge cake, you get colorful little cake dots that create a playful polka-dot effect. It is bright, cheerful, and perfect for birthdays, kids’ parties, baby showers, school events, or any celebration where you want the dessert table to feel a little more special.
This recipe is especially great if you love creative baking but do not want anything too complicated. You only need a basic vanilla cake batter, a few food colors, and some time to prepare the colorful cake dots. Once everything is baked together, the result looks impressive without needing professional cake-decorating skills.
What Is a Dot Cake?
A dot cake is a surprise-inside cake made by adding small colored cake balls into a plain cake batter before baking. When the cake is sliced, the colorful balls appear as dots inside the cake.
The outside can be kept very simple with white frosting, whipped cream, or buttercream. This makes the inside look even more exciting when the cake is cut. It is similar to a polka dot cake, but the dots are usually made from baked cake crumbs or cake balls instead of sprinkles.
You can make the dots in bright rainbow colors, soft pastel shades, chocolate and vanilla tones, or colors that match your event theme.
Why You’ll Love This Dot Cake Recipe
This cake is fun, colorful, and beginner-friendly. It is a great recipe when you want something more exciting than a regular vanilla cake but still easy enough to make at home.
Dot cake is also very customizable. You can choose the dot colors based on the occasion. Use pink and blue for a baby shower, rainbow colors for a birthday, red and green for Christmas, or soft pastels for a spring party.
Another reason this cake works so well is that it photographs beautifully. The clean frosting and colorful inside make it perfect for Pinterest, Instagram, party blogs, and dessert boards.
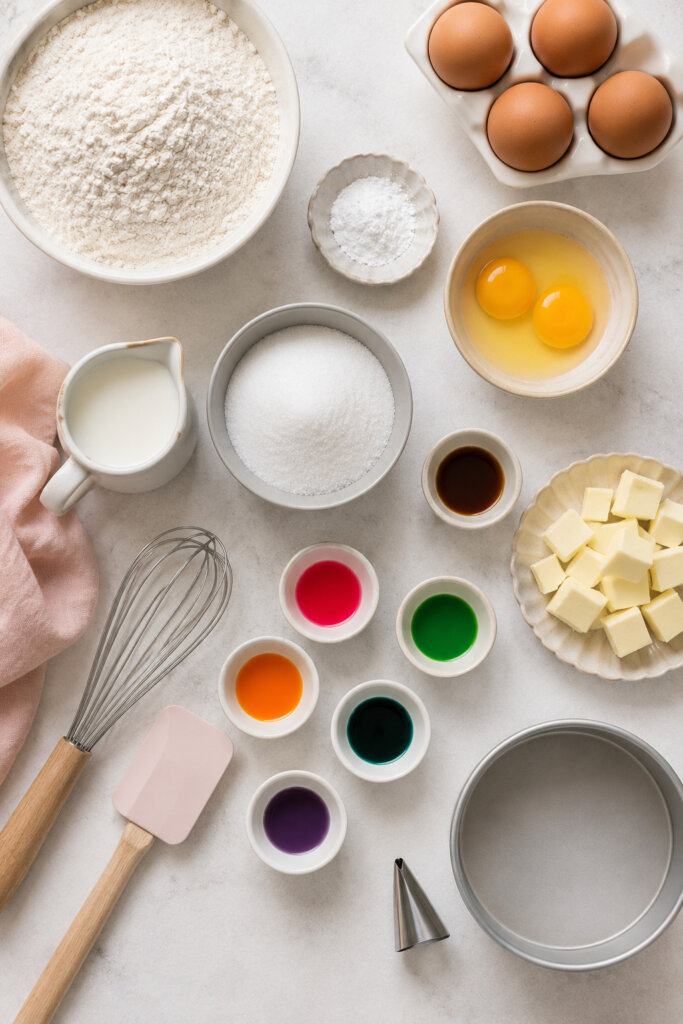
Ingredients
For the Colorful Cake Dots
- 1 cup all-purpose flour
- ½ cup sugar
- ½ cup butter, softened
- 2 eggs
- ½ teaspoon baking powder
- ½ teaspoon vanilla extract
- 2 tablespoons milk
- Food colors of your choice
For the Main Vanilla Cake
- 1½ cups all-purpose flour
- 1 cup sugar
- ¾ cup butter, softened
- 3 eggs
- 1½ teaspoons baking powder
- 1 teaspoon vanilla extract
- ½ cup milk
- A pinch of salt
For Frosting and Decoration
- Whipped cream or vanilla buttercream
- Colorful sprinkles
- Extra cake crumbs, optional
- Chocolate chips, optional
How to Make Dot Cake
Step 1: Prepare the Batter for the Cake Dots
Start by making a small batch of vanilla cake batter for the colorful dots. In a mixing bowl, beat the softened butter and sugar until the mixture becomes light and creamy.
Add the eggs one at a time and mix well after each addition. Add vanilla extract, flour, baking powder, and milk. Mix everything until you get a smooth batter.
Divide this batter into small bowls depending on how many colors you want to use. Add a few drops of food coloring to each bowl and mix gently until the color is even.
Gel food colors are a better choice if you want bright dots because they create strong colors without making the batter too thin.
Step 2: Bake the Colored Cakes
Pour each colored batter into a small cake pan, cupcake tray, or mini baking mold. Bake at 180°C or 350°F for about 12 to 15 minutes, or until a toothpick comes out clean.
Once baked, let the colored cakes cool completely. Do not rush this step because warm cake will be too soft and may not form neat dots.
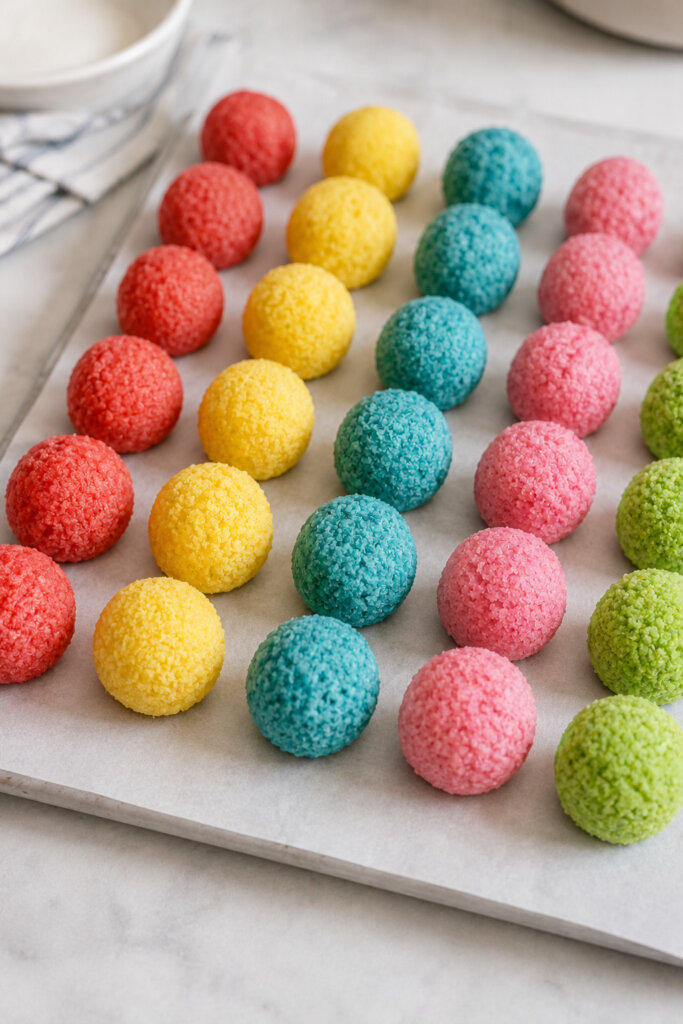
After cooling, crumble each colored cake separately and roll the crumbs into small round balls. These cake balls will become the dots inside your final cake.
For smoother, more even dots, you can also use a cake pop mold.
Step 3: Make the Main Cake Batter
Now prepare the main vanilla cake batter. In a large bowl, beat butter and sugar until soft and fluffy. Add the eggs one by one and mix until combined.
Add vanilla extract, flour, baking powder, and a pinch of salt. Slowly pour in the milk and mix until the batter becomes smooth.
Try not to overmix the batter. Overmixing can make the cake heavy instead of soft and fluffy.
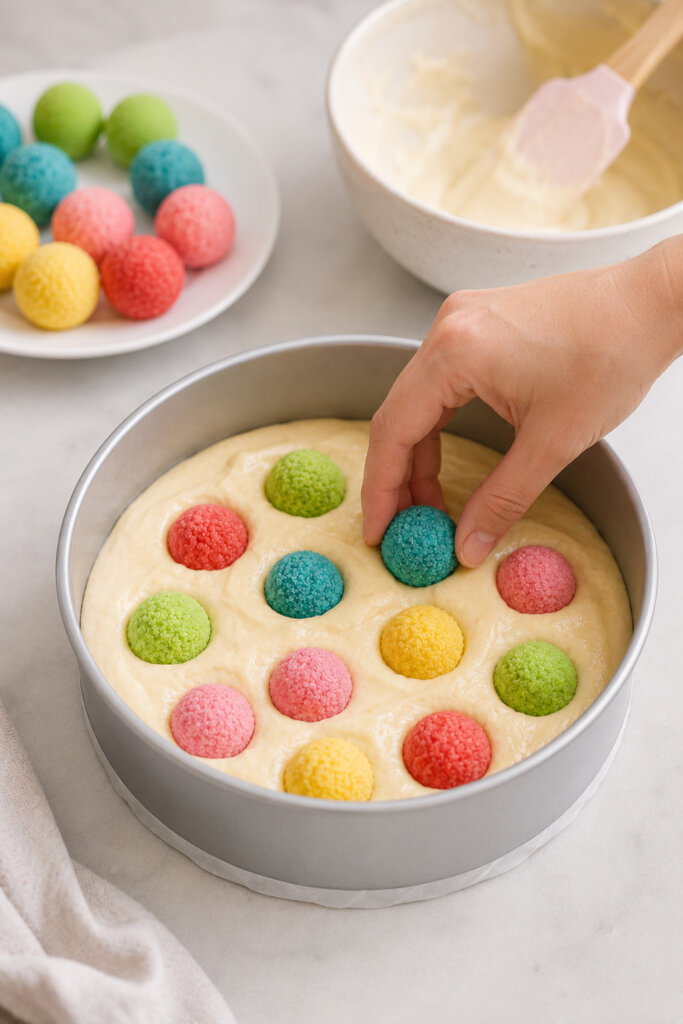
Step 4: Add the Cake Dots to the Batter
Grease a cake pan and line it with parchment paper. Pour a thin layer of vanilla cake batter into the bottom of the pan.
Place a few colorful cake dots over the batter. Add more batter on top, then add more dots. Continue layering until the pan is filled.
Make sure the cake dots are covered with batter so they stay hidden inside the cake. Avoid placing all the dots in one area. Spread them gently so every slice has a colorful surprise.
Step 5: Bake the Dot Cake
Bake the cake at 180°C or 350°F for 30 to 40 minutes. The exact time may depend on your oven and cake pan size.
The cake is ready when the top looks golden and a toothpick inserted into the center comes out clean.
Let the cake cool in the pan for about 10 minutes, then transfer it to a wire rack. Allow it to cool fully before adding frosting.
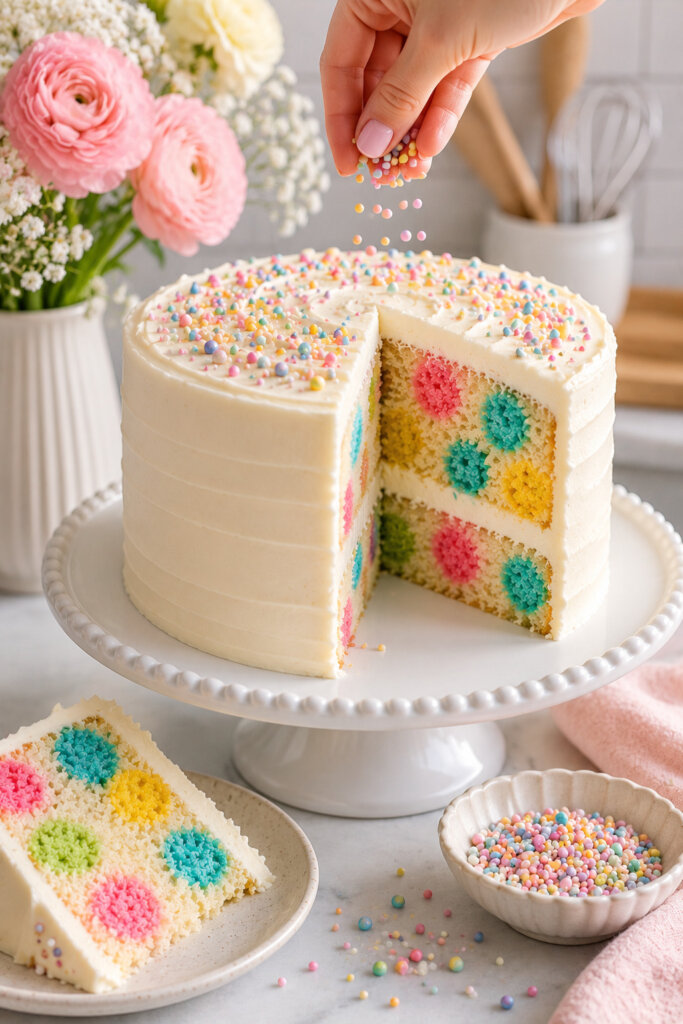
Step 6: Frost and Decorate
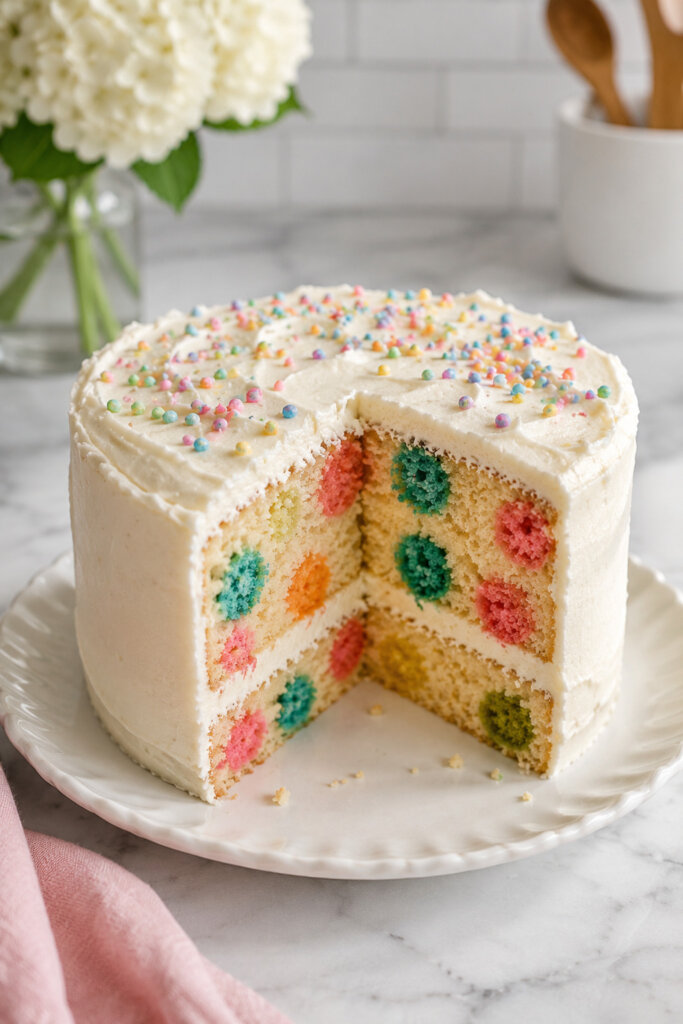
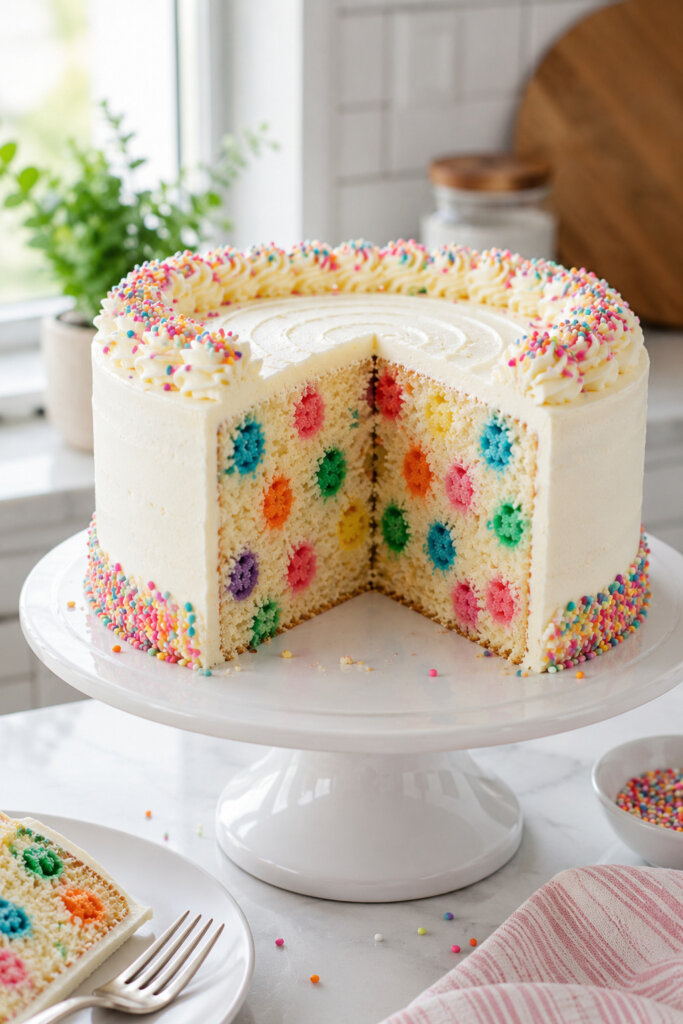
Once the cake is completely cool, cover it with whipped cream or vanilla buttercream frosting. A smooth white frosting works beautifully because it keeps the outside simple and lets the colorful inside become the main surprise.
Add pastel sprinkles, colorful crumbs, or mini chocolate chips on top. You can also keep the decoration minimal if you want a cleaner, more elegant look.
Helpful Tips for the Best Dot Cake
Use gel food coloring for brighter dots. Liquid food color can work, but it may make the batter thinner and the colors less bold.
Let the colored cakes cool completely before rolling them into dots. If the crumbs are warm, the dots can become sticky and uneven.
Keep the cake dots small. Large dots may make the cake harder to slice and can create uneven pockets inside the sponge.
Do not overfill your cake pan. The cake needs room to rise, especially after adding the cake balls.
Chill the cake before slicing if you want very neat pieces. This is especially helpful if you are using whipped cream frosting.
Dot Cake Variations
Rainbow Dot Cake
Use red, orange, yellow, green, blue, and purple cake dots for a bright birthday-style cake. This version is perfect for kids’ parties and colorful celebration tables.
Pastel Dot Cake
Use soft pink, lavender, mint, baby blue, and pale yellow dots. This version looks beautiful for baby showers, spring parties, or feminine dessert tables.
Chocolate Dot Cake
Use chocolate cake batter as the main cake and add vanilla or colorful cake dots inside. This creates a rich and fun version for chocolate lovers.
Funfetti Dot Cake
Add sprinkles to the main vanilla cake batter along with the colorful dots. This gives the cake an extra party feel.
How to Serve Dot Cake
Dot cake can be served at room temperature or slightly chilled. If you want clean slices, refrigerate the cake for 20 to 30 minutes before cutting.
It pairs well with tea, coffee, hot chocolate, milk, or a fruit drink. For parties, you can serve it with cupcakes, cookies, mini brownies, or colorful cake pops to create a complete dessert table.
Use a sharp knife to cut the cake and wipe the blade between slices. This keeps the frosting clean and helps the colorful dots show clearly.
How to Store Dot Cake
Store dot cake in an airtight container at room temperature for 1 day if the weather is cool. If your cake has whipped cream, cream cheese frosting, or dairy-based frosting, keep it in the refrigerator.
The cake can usually stay fresh in the fridge for 3 to 4 days. Before serving, let it sit at room temperature for 10 to 15 minutes so the sponge becomes soft again.
You can also make the cake dots a day in advance and store them in an airtight container. This makes the final baking process easier and faster.
Common Mistakes to Avoid
Do not add the cake dots while they are too soft or warm. They may break apart in the batter.
Do not use too much food coloring. A little gel color is enough to create bright dots.
Do not cut the cake while it is still warm. Warm cake can crumble and the dots may not look neat.
Do not mix the cake dots aggressively into the batter. Place them gently in layers so they stay round and visible after slicing.
Final Thoughts
Dot cake is a fun, colorful, and surprisingly simple cake recipe that can turn any celebration into something more memorable. It looks beautiful on the outside, but the real magic happens when you cut into it and reveal the hidden colorful dots inside.
Whether you make it for a birthday, baby shower, holiday party, or weekend baking project, this cake is a lovely way to bring creativity into your kitchen.
For more cute recipes, party desserts, baking ideas, and Pinterest-worthy food inspiration, visit Morningfable.com and discover more beautiful ideas for your next sweet treat.